Sign up for our newsletter to stay up to date with
the latest HFLOR/HIMACS design trends and news.

HIMACS: SLO_GEN table
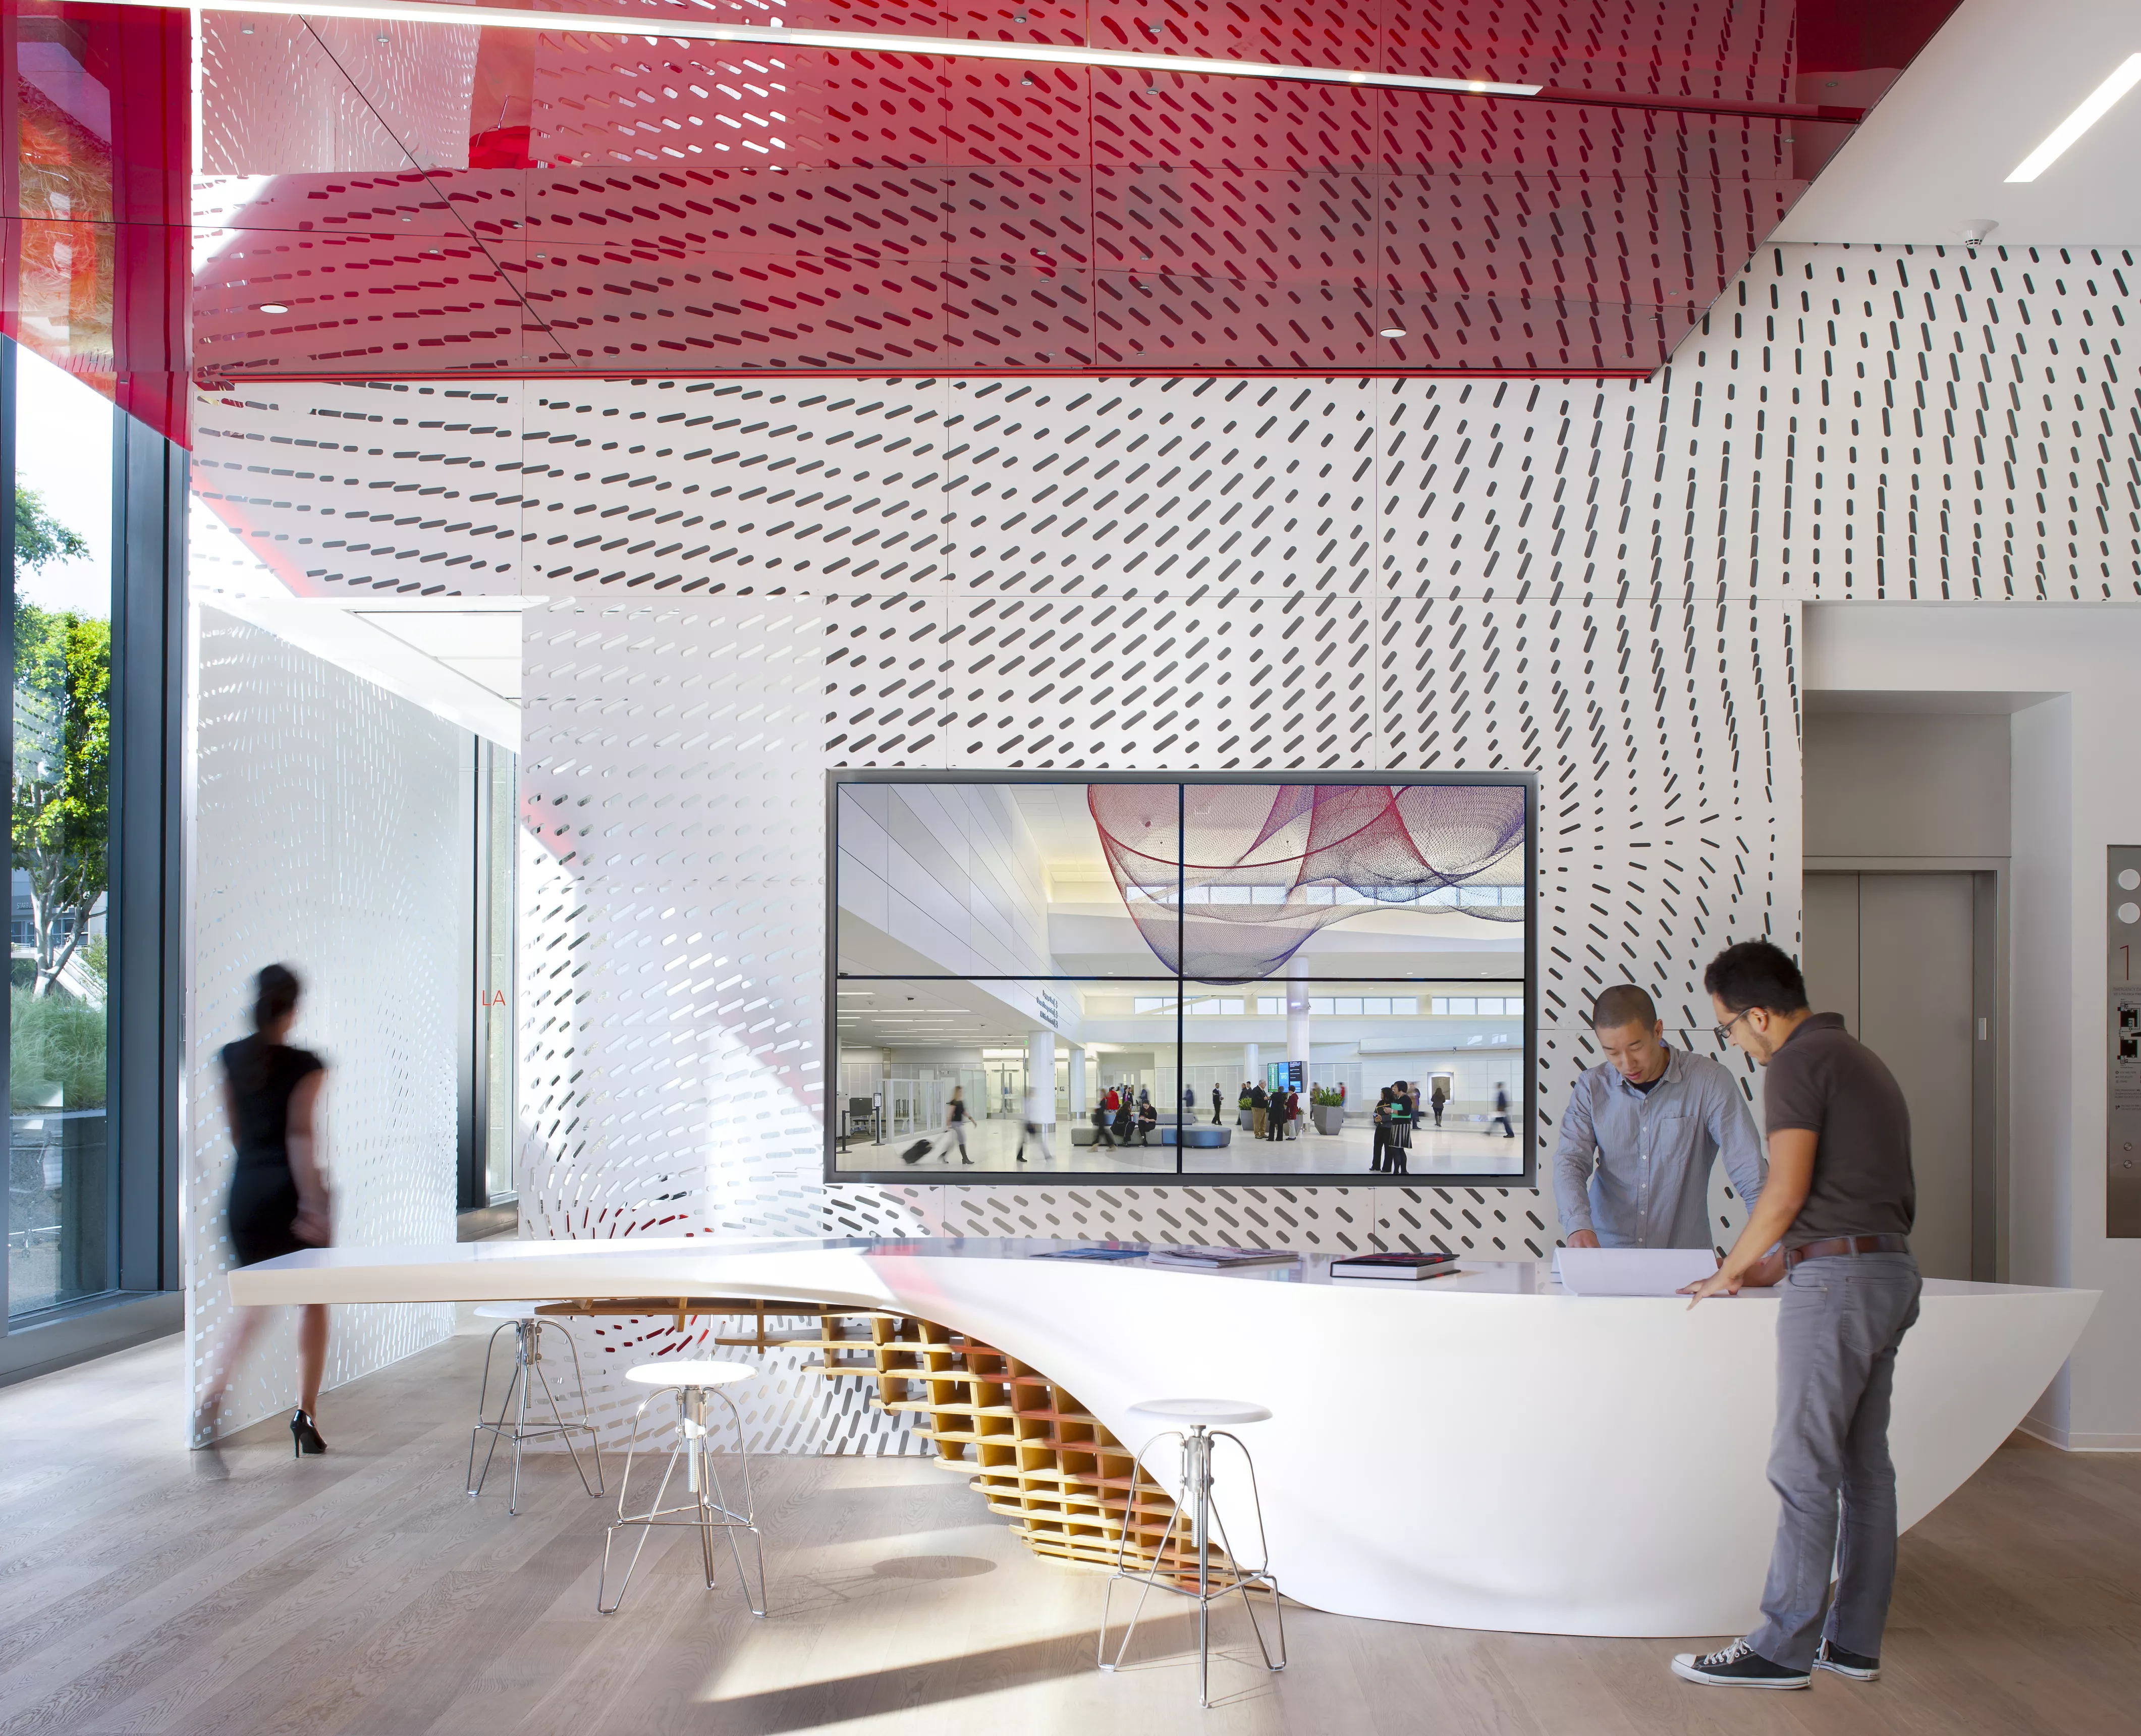
Organic SLO_GEN table - made with HI-MACS® - amazes visitors at Gensler offices
The SLO_Gen communal table is the new focal point of Gensler’s Los Angeles office lobby, and the result of an innovative partnership between Gensler and the Department of Architecture at the College of Architecture and Environmental Design at Cal Poly, San Luis Obispo (California). In order to achieve the stunning and outstanding curves, HIMACS turned out to be the key material thanks to its thermoforming properties, resistance, seamless joints and the smooth surface, which convinced the architects and engineers from the first meeting.
In 2011, professors Jim Doerfler and Mark Cabrinha, co-directors of Cal Poly’s Digital Fabrication Lab (“d[Fab]Lab”) reached out to Gensler L.A. design director Shawn Gehle to create a fully-virtualized studio focused on digital fabrication and online collaboration tools. In response, Gehle authored a unique, 10-week seminar that would allow students access to the firm’s design talent and explore form-finding and digital fabrication techniques through the design of a custom furniture piece. The design brief simply outlined a piece that could accommodate standing and sitting space for guests and storage for the firm’s design publications. The piece would need to be site-specific and prominently featured in Gensler’s new downtown Los Angeles office.
A virtual 3D prototype
Beyond an initial in-person meeting, Cal Poly students and d[Fab]Lab faculty met with Gensler advisors via the online collaboration tool GoToMeeting to conduct weekly seminar discussions and review the team’s progress. In addition to bridging the 300-mile gap between designers in Los Angeles and students and faculty in San Luis Obispo, this method allowed professional consultants and materials specialists to participate easily, while exposing students to the kind of virtual collaboration that is prevalent in professional practice today. Maintaining a focus on a digital workflow, the team’s design and documentation process also was conducted virtually, substituting a 3-D model as the deliverable for fabrication in lieu of a traditional set of 2-D drawings. Over the course of the seminar, the original concepts of three students were developed and refined using the 3-D modeling software Rhino and T-Splines, and virtually reviewed and critiqued weekly with Gensler’s design staff.
Structural engineers at Buro Happold and HIMACS solid surfacing material provider LG Hausys joined multiple discussions to examine schemes and offer insight on constructability, cost and structural integrity. A final, in-person meeting in Los Angeles focused on the review of physical prototypes and material samples, and enabled the team to address the challenges of forming fiberglass vs. Solid Surface HIMACS as the table’s predominant surface material.
Inspired by the design and opportunity, LG Hausys became a partner in the project, providing technical expertise and support for their HIMACS solid surface material, which proved to be the ideal material for achieving the table’s draped surface. LG Hausys also introduced the team to the capabilities of R.D. Wing Co. Inc., the Seattle-based fabrication specialists who ultimately constructed and delivered the table’s designThe SLO_Gen table was recently installed in the main entry of Gensler Los Angeles, where its dramatic profile continues to lure pedestrians in from the street and prompt conversation on its origin. Thanks to the HIMACS outstanding capacity to be combined with other materials, the combination between the white colour of the solid surface with the natural Wood creates a soft and elegant contrast.
Integrate the Plywood with HIMACS solid surface
Cut paths for the table’s plywood ribs were extracted from the 3D model and laid out onto1,2 x 2,4 mt sheets of Europly for CNC machining. The table required 12 sheets of plywood to cut all the rib pieces. During the machining process, tabs were left along the edges of the ribs to connect them together and to stabilize the falloff. These were ultimately cut, filed, and sanded by hand. The reason for this fabrication method was to hold down the shapes while machining, keep them from shattering, and not damaging any of the surface faces with tape or screws. After cutting off the tabs, the ribs were then varnished to a satin finish. Once the varnish dried, the eggcrate was assembled by hand using a mallet and dados.
HIMACS thermoforming and integration with Wood
Beginning with an S-shaped top, 4 separate pieces of HIMACS were milled on a CNC router. This number was due to the size limitation of the stock material and overall size of the table. The individual pieces produced were then glued together and sanded flat, acting as the only “flat” portion of the table’s solid surface.
A 1,5 mt-wide strip (in multiple pieces) was machined to follow the curve of the table’s surface. This strip was used as a back-up strap where the table’s sidewall would meet the underside of the top. This strap was glued into place, with rolling undulations machined into its profile to assist the shop later in aligning the sidewalls later in the process.
Given the severity of curvature in the table’s HIMACS sidewall panels, deciding how to panelise and form the surface proved critical. This step required determining which portions of the solid surface could be machined to shape without moulds, which required moulds and of what type, and also where and how to best panelise the table’s shell to optimize the material provided by LG Hausys.
To optimize the material, increase the workability of the solid surfacing and address individual nuances, each side of the table was broken into 5 sections based on the topography of the individual surface. R.D. Wing created a mixture of moulds – with no two moulds being the same - to fabricate each sidewall. The only way to achieve the most complicated portions of the sidewall with solid surfacing was to utilize a clamshell mould, allowing the solid surface material to be thermoformed by simultaneous pressure applied from both the front and back. This technique required two moulds be milled for each section formed - a male and female, and additional consideration had to be given as to how large the moulds needed to be (and therefore how much material would be required).
To create the thermoforming moulds, R.D. Wing used 15-20-pound polyurethane foam, left over from other projects. The sides of the foam moulds were left unfinished, and because of this the moulds for each section could be used up to 10 times if necessary. The foam was mounted to an MDF base and milled with a CNC router in stacks of 1,27 cm. Each layer was machined, and then a new layer of stock added on top of it. This process was repeated until an entire mould was made. A tight machining step-over was used to eliminate the need for sanding. A trim line was added around the perimeter of the moulds so the shop could see how one panel would fit to the next. Once all the moulds were machined and cleaned of excess foam, a layer of cotton was added to the surface for heat dispersion. For the largest portions of HIMACS requiring thermoforming in two directions (complex curves), the pieces were first heated, and then placed within the clamshell mould. Of the 5 moulds, it took 12 individual HIMACS pieces to make all the sides. There was some trial and error that went into deciding how many individual pieces were needed. After they had the 12 pieces roughly formed to shape, they put them back into the mould and began laying them out for the final trim. Each piece was trimmed to the corresponding piece and, using the form, glued together. The smaller pieces were seamed together until there were 5 main pieces.
The side pieces were pre-glued into 5 usable pieces, then fitted onto the sides of the wood structure. The sidepieces were matched to the underside of the table against the seam strap included in the top surface, keeping the sides firmly against the wood structure, and pulling everything together for seaming.
The next step was to cut the bottom flush and the side that faced the shelves, then cut the seamed side straight and create a flat edge to bond to the underside of the table. After bonding the first section to the underside of the table and siliconing the back of the first section to the wood structure, the next section was pre-fit to the underside of the table and the corresponding section. This approach required cutting the shape with as little gap as possible, then hand filing it to the final fit. Once fitted tightly, the process was repeated around the perimeter.
After all the sections were glued together, all the exposed surfaces were sanded. The final step was to finish sand the entire surface and fix minor imperfections.
Once fabricated, the entire table was mounted inside a custom built crate for shipping and delivery.
| Location | Gensler Los Angeles, Los Angeles (California, USA) |
| Architecture & Design | Cal Poly, San Luis Obispo, Department of Architecture, College of Architecture and Environmental Design Faculty: Jim Doerfler, Mark Cabrinha Students: Ben Hait-Campbell, Cory Walker, Kegan Charles Flanderka Gensler LA |
| Fabrication | R.D. Wing Co., Inc. |
| Photo Credit | ©Gensler Los Angeles |
| Press Release Download press release | |
Project gallery
-
Download images
If you are a journalist, it is possible to select the medias you want and ask us to provide them in HD.
ORDER PROJECT IMAGES
-
Download images
If you are a journalist, it is possible to select the medias you want and ask us to provide them in HD.
ORDER PROJECT IMAGES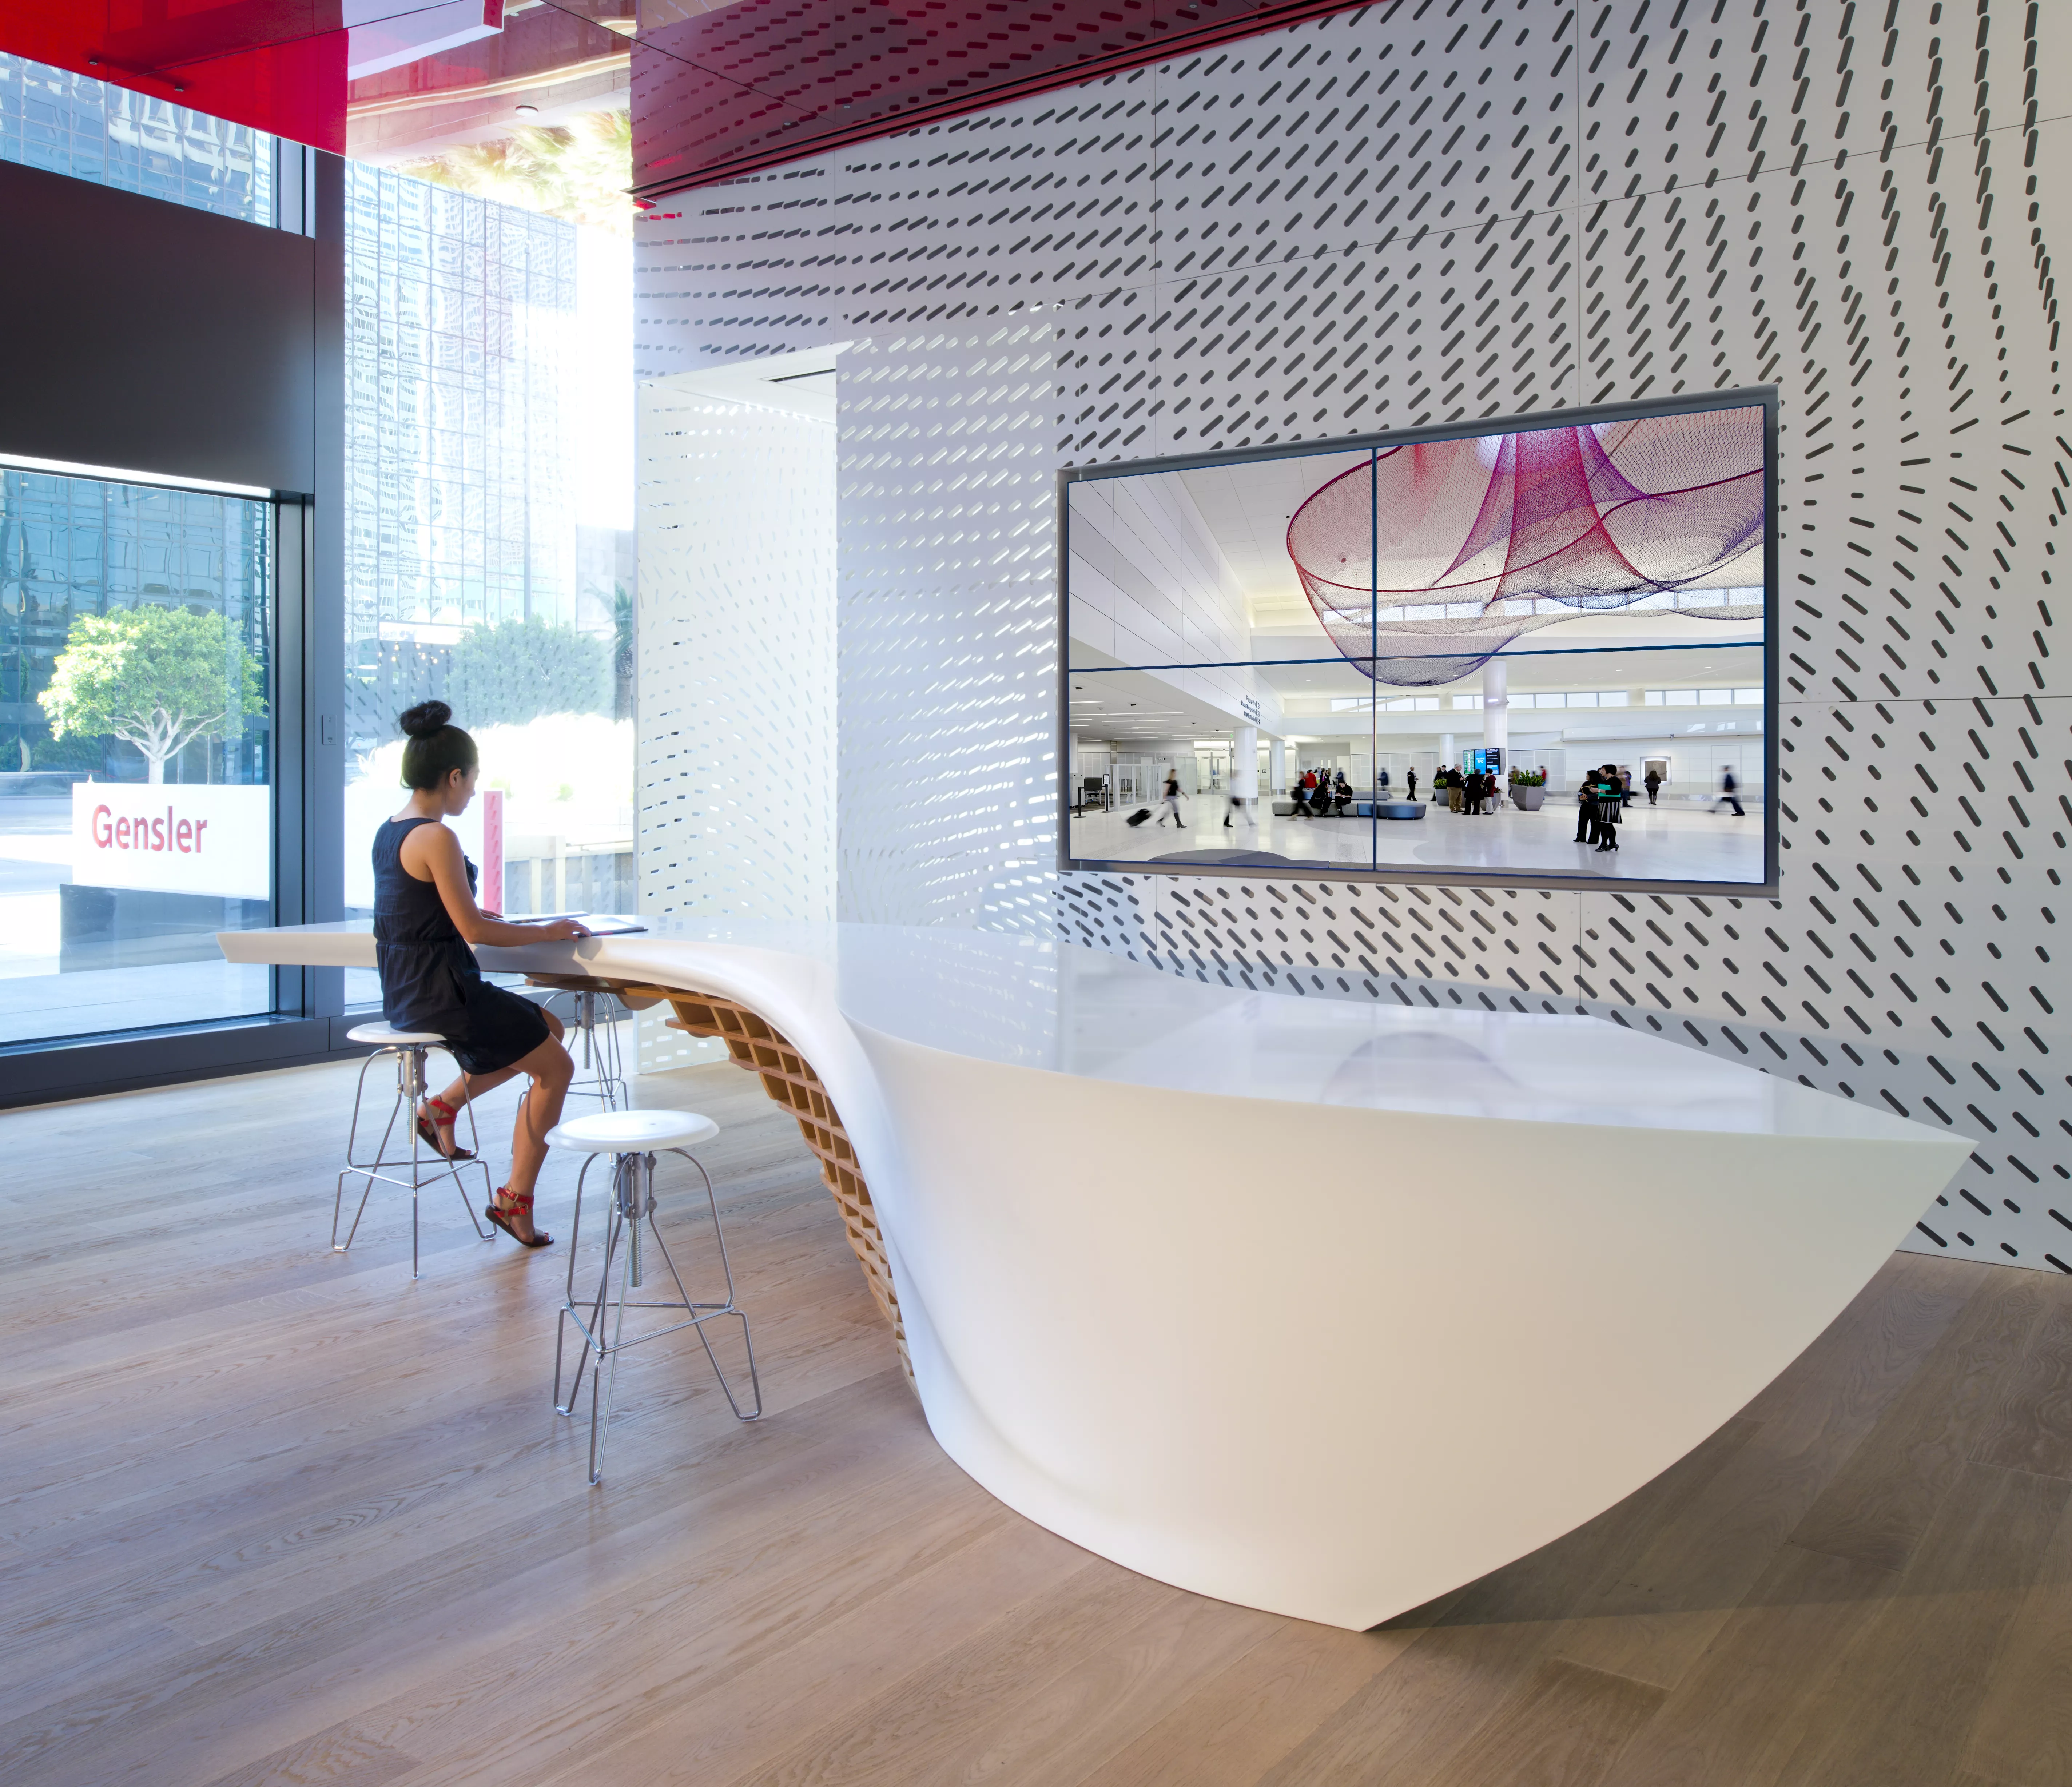
-
Download images
If you are a journalist, it is possible to select the medias you want and ask us to provide them in HD.
ORDER PROJECT IMAGES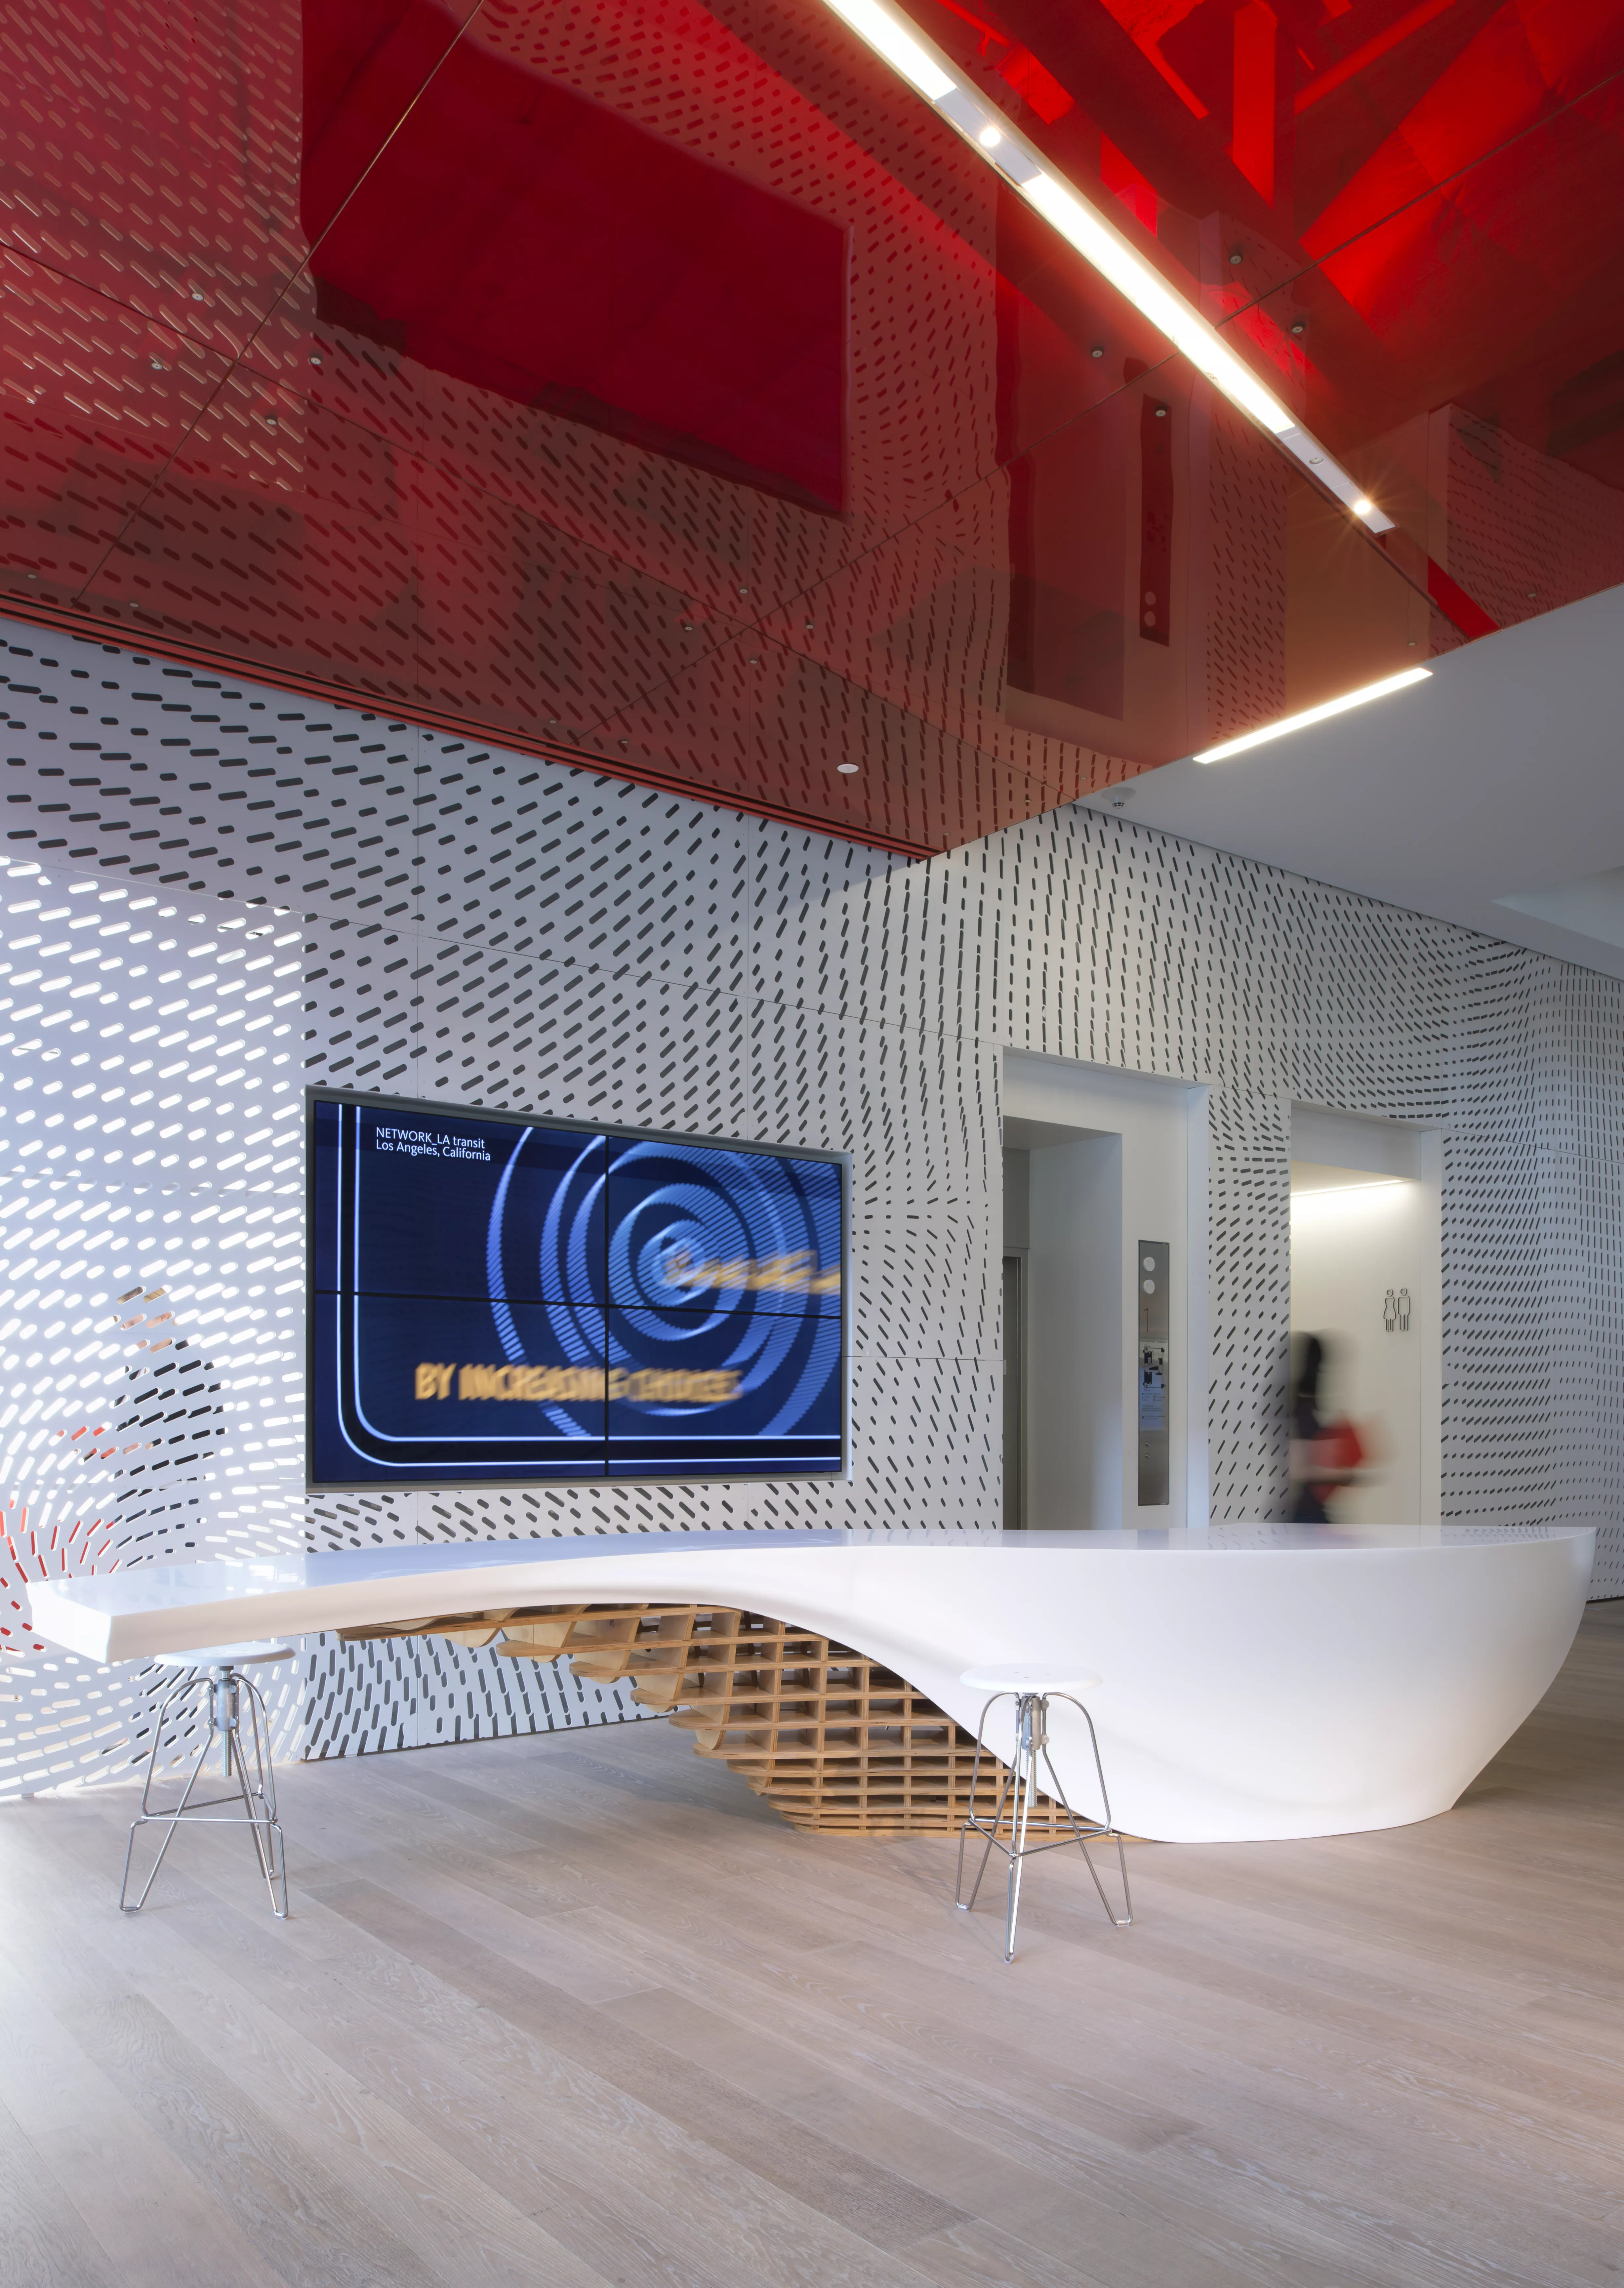
-
Download images
If you are a journalist, it is possible to select the medias you want and ask us to provide them in HD.
ORDER PROJECT IMAGES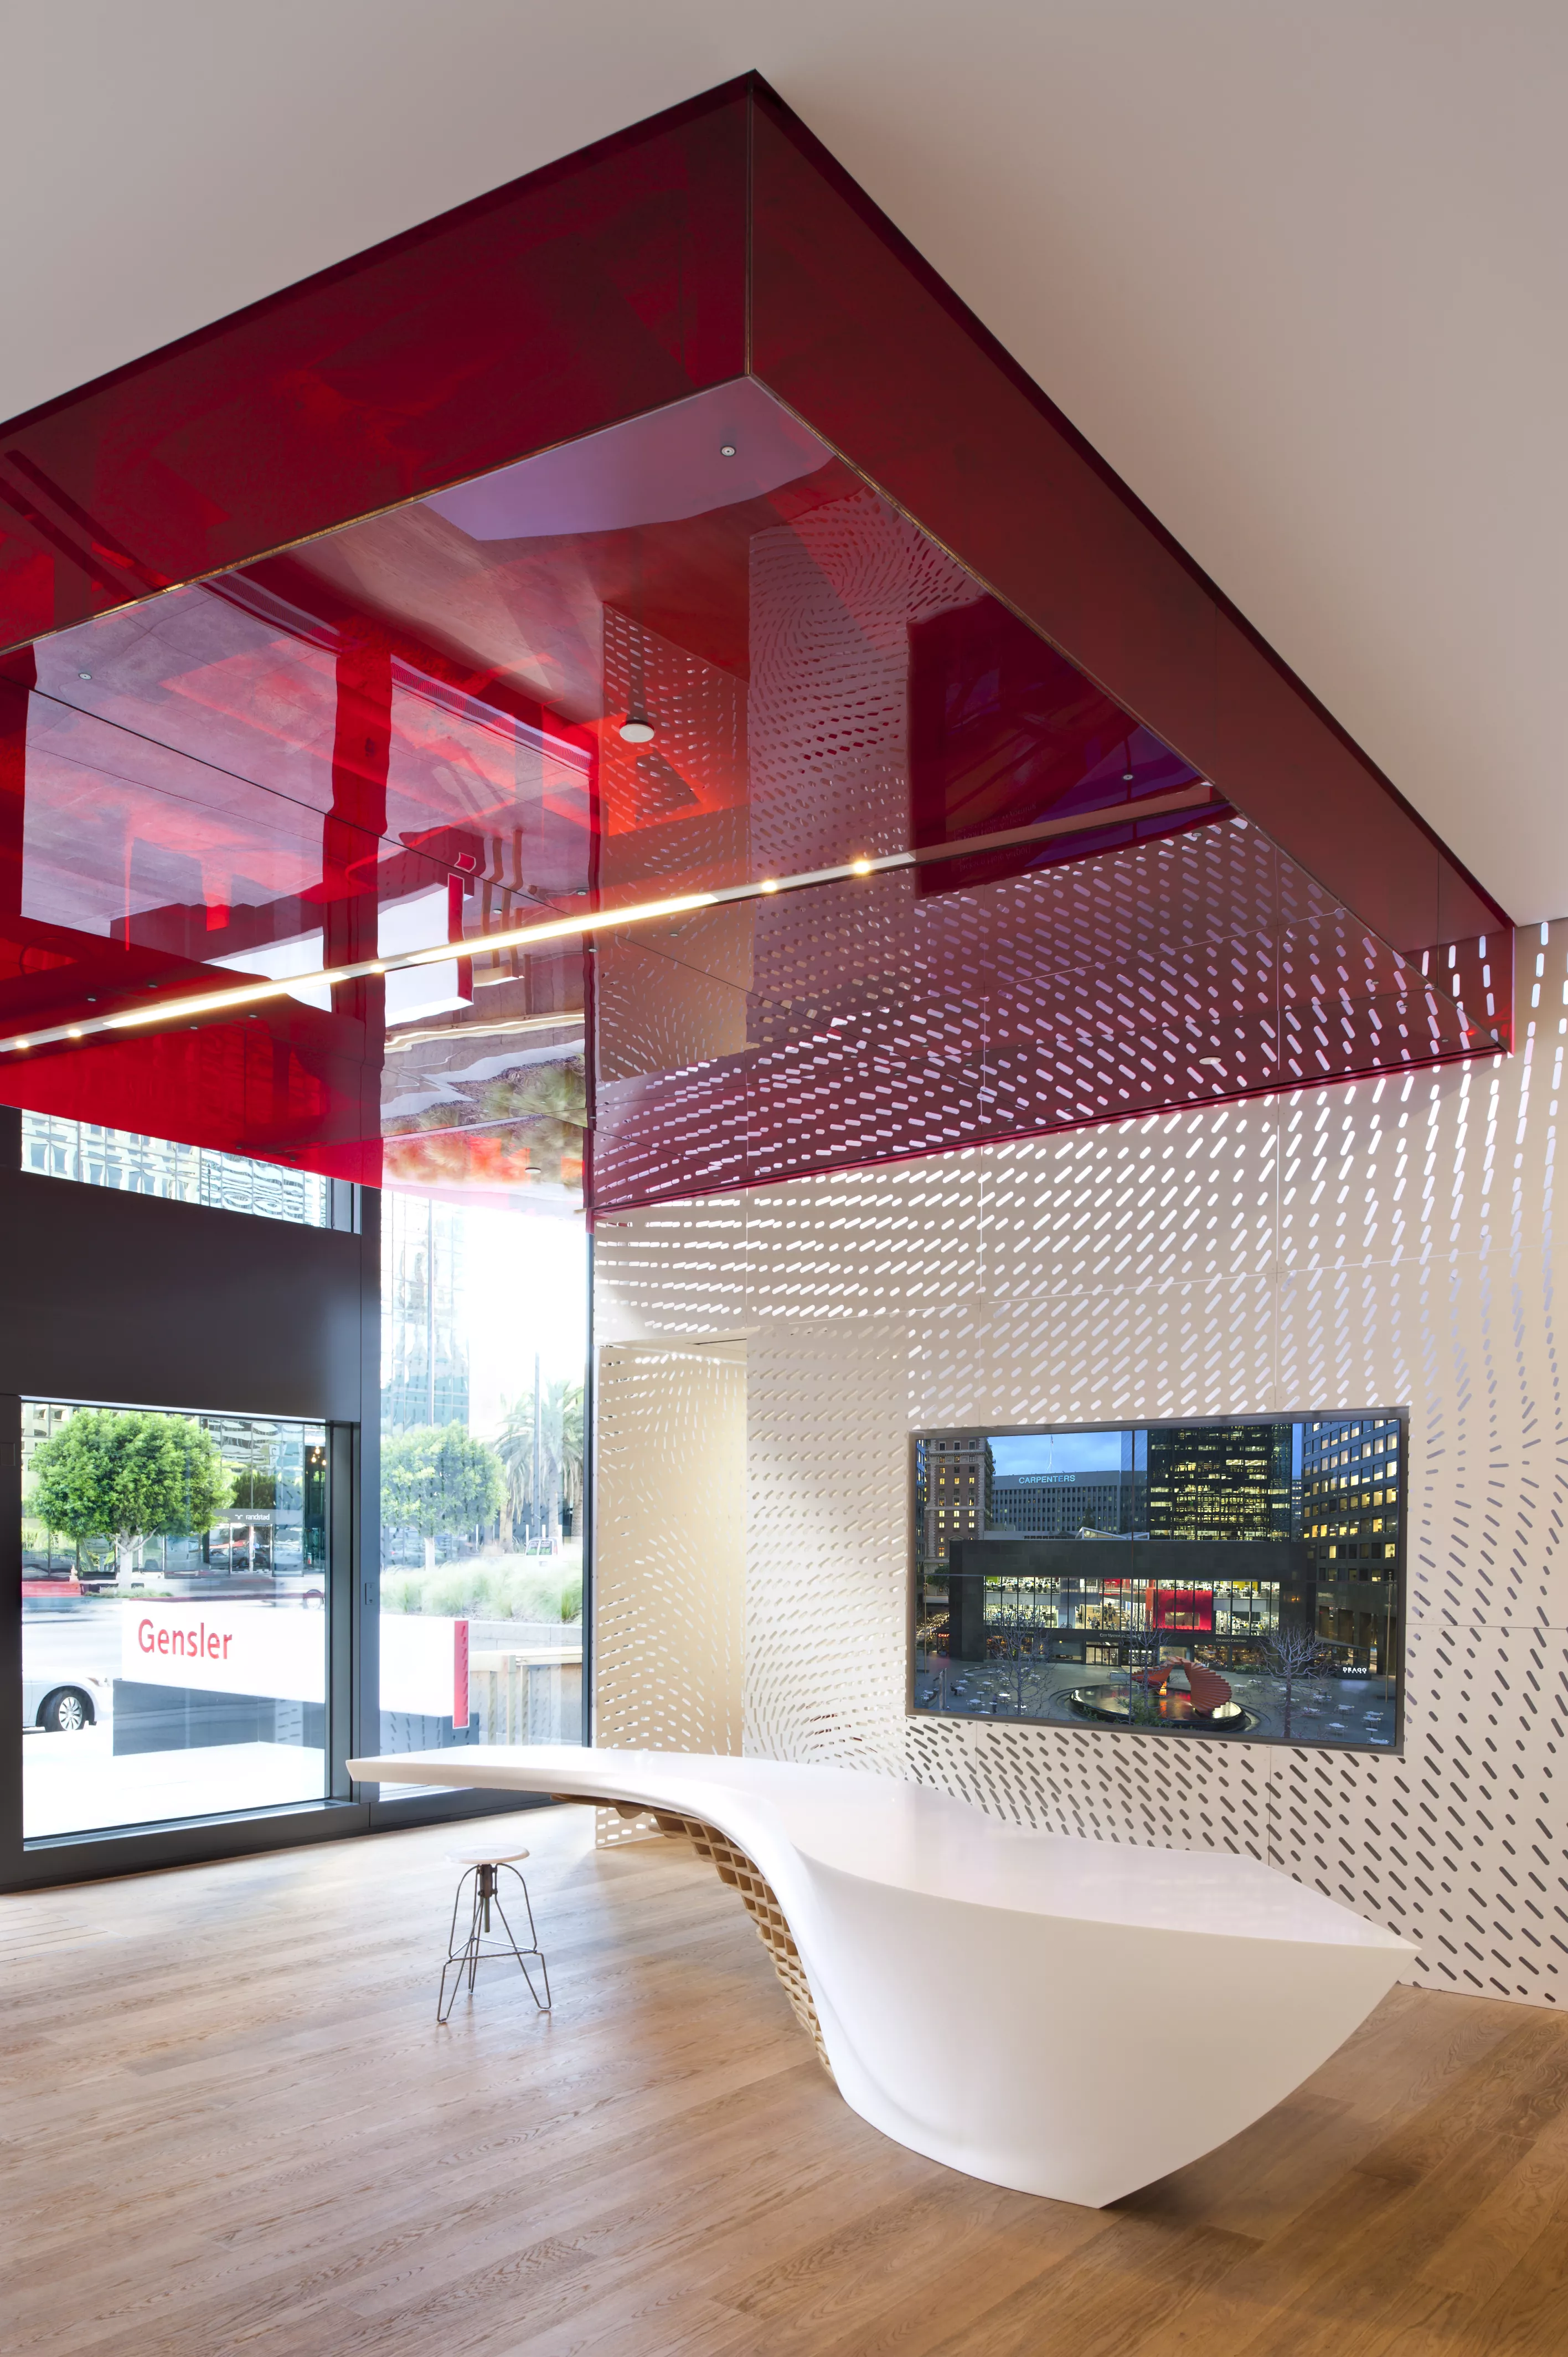
-
Download images
If you are a journalist, it is possible to select the medias you want and ask us to provide them in HD.
ORDER PROJECT IMAGES
-
Download images
If you are a journalist, it is possible to select the medias you want and ask us to provide them in HD.
ORDER PROJECT IMAGES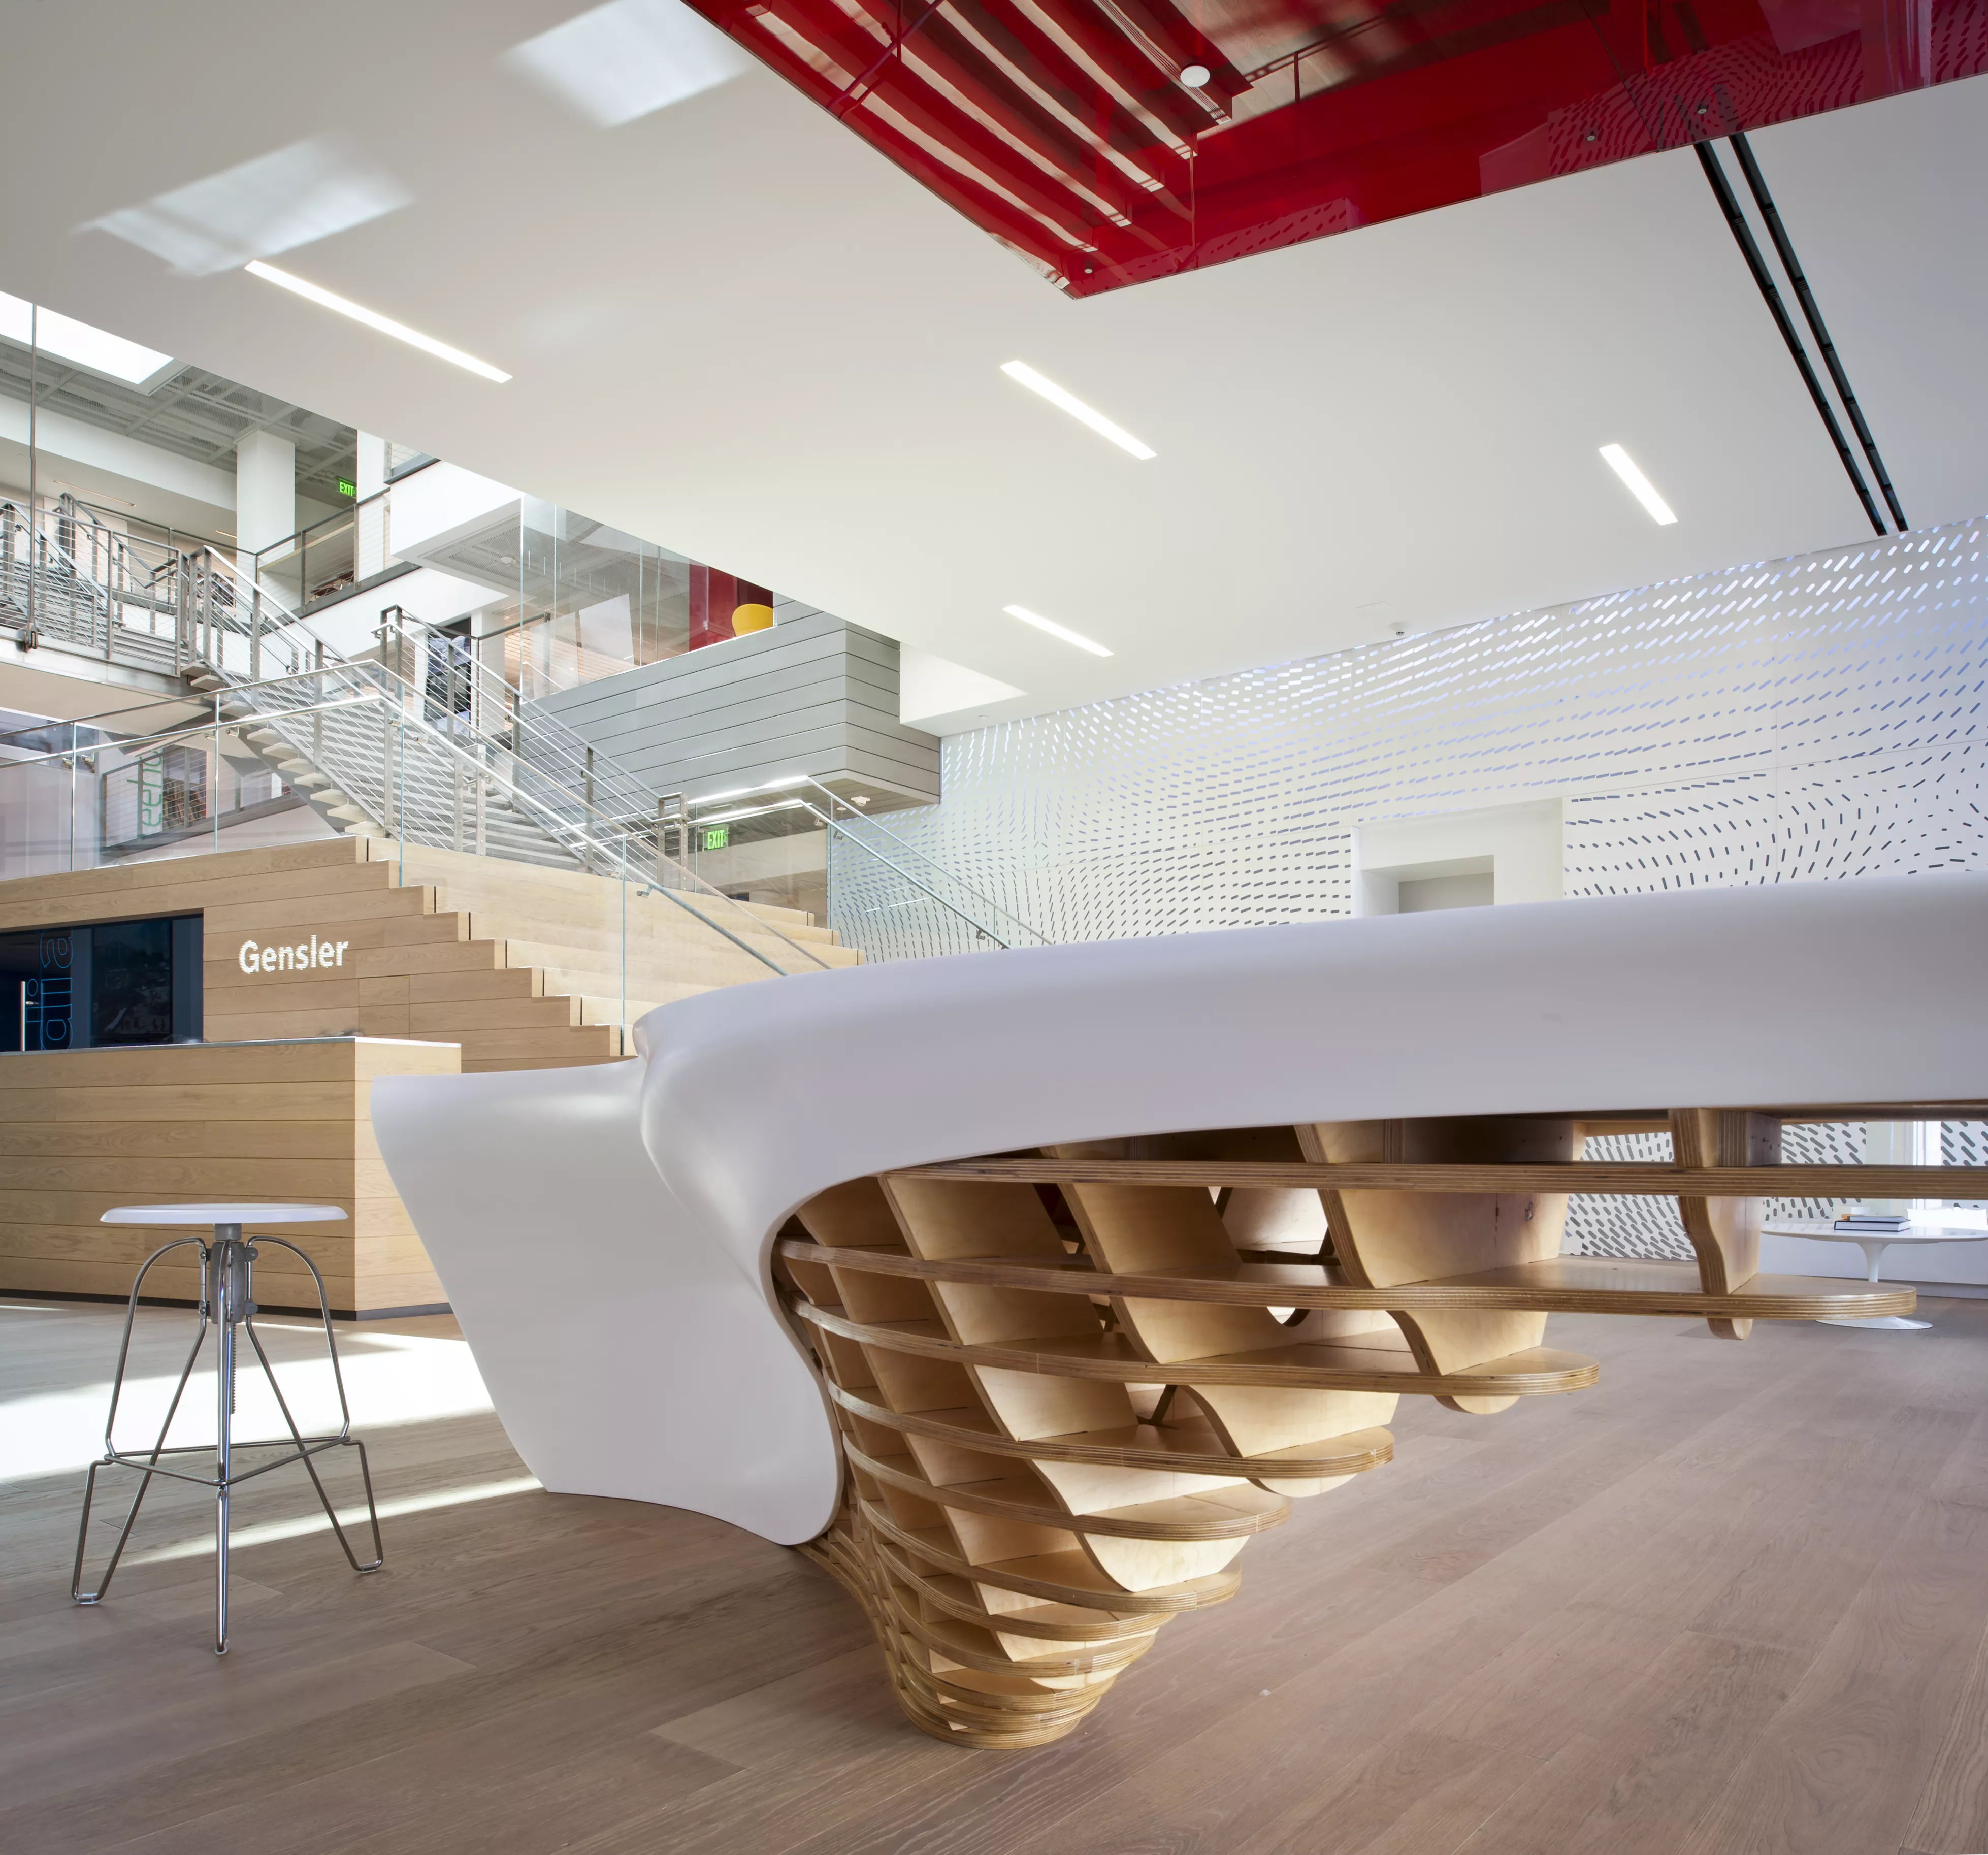
-
Download images
If you are a journalist, it is possible to select the medias you want and ask us to provide them in HD.
ORDER PROJECT IMAGES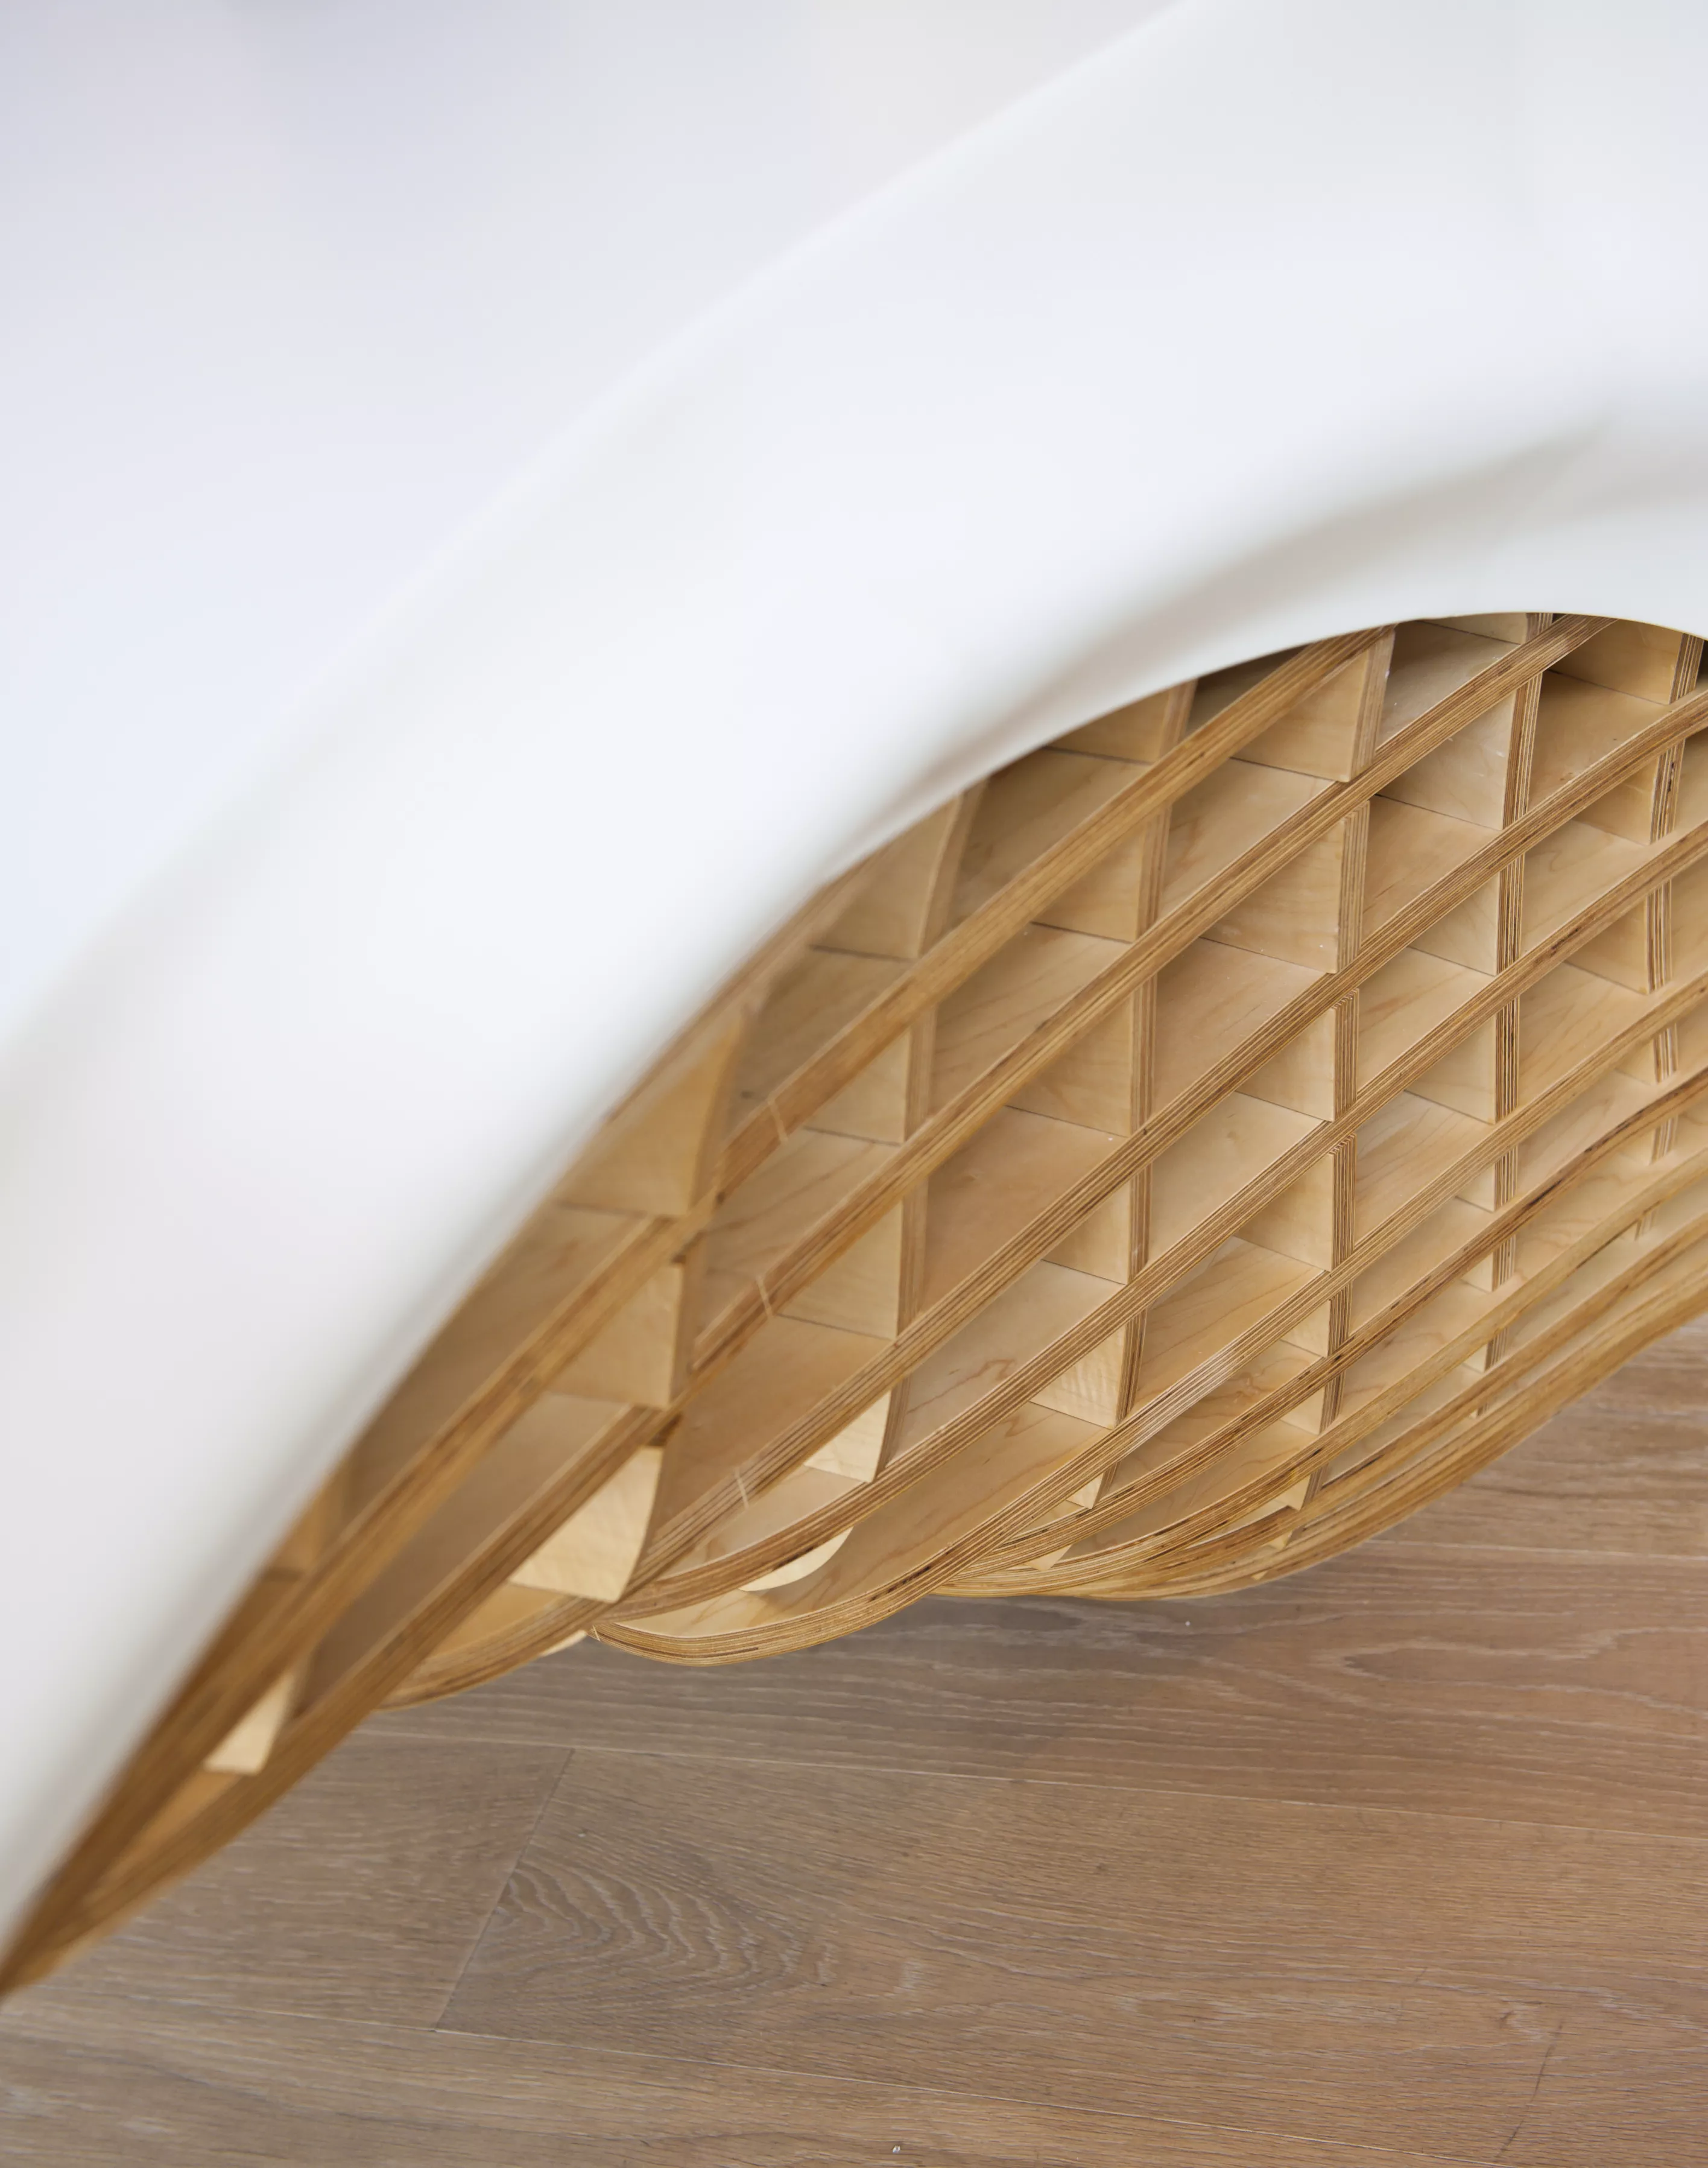
-
Download images
If you are a journalist, it is possible to select the medias you want and ask us to provide them in HD.
ORDER PROJECT IMAGES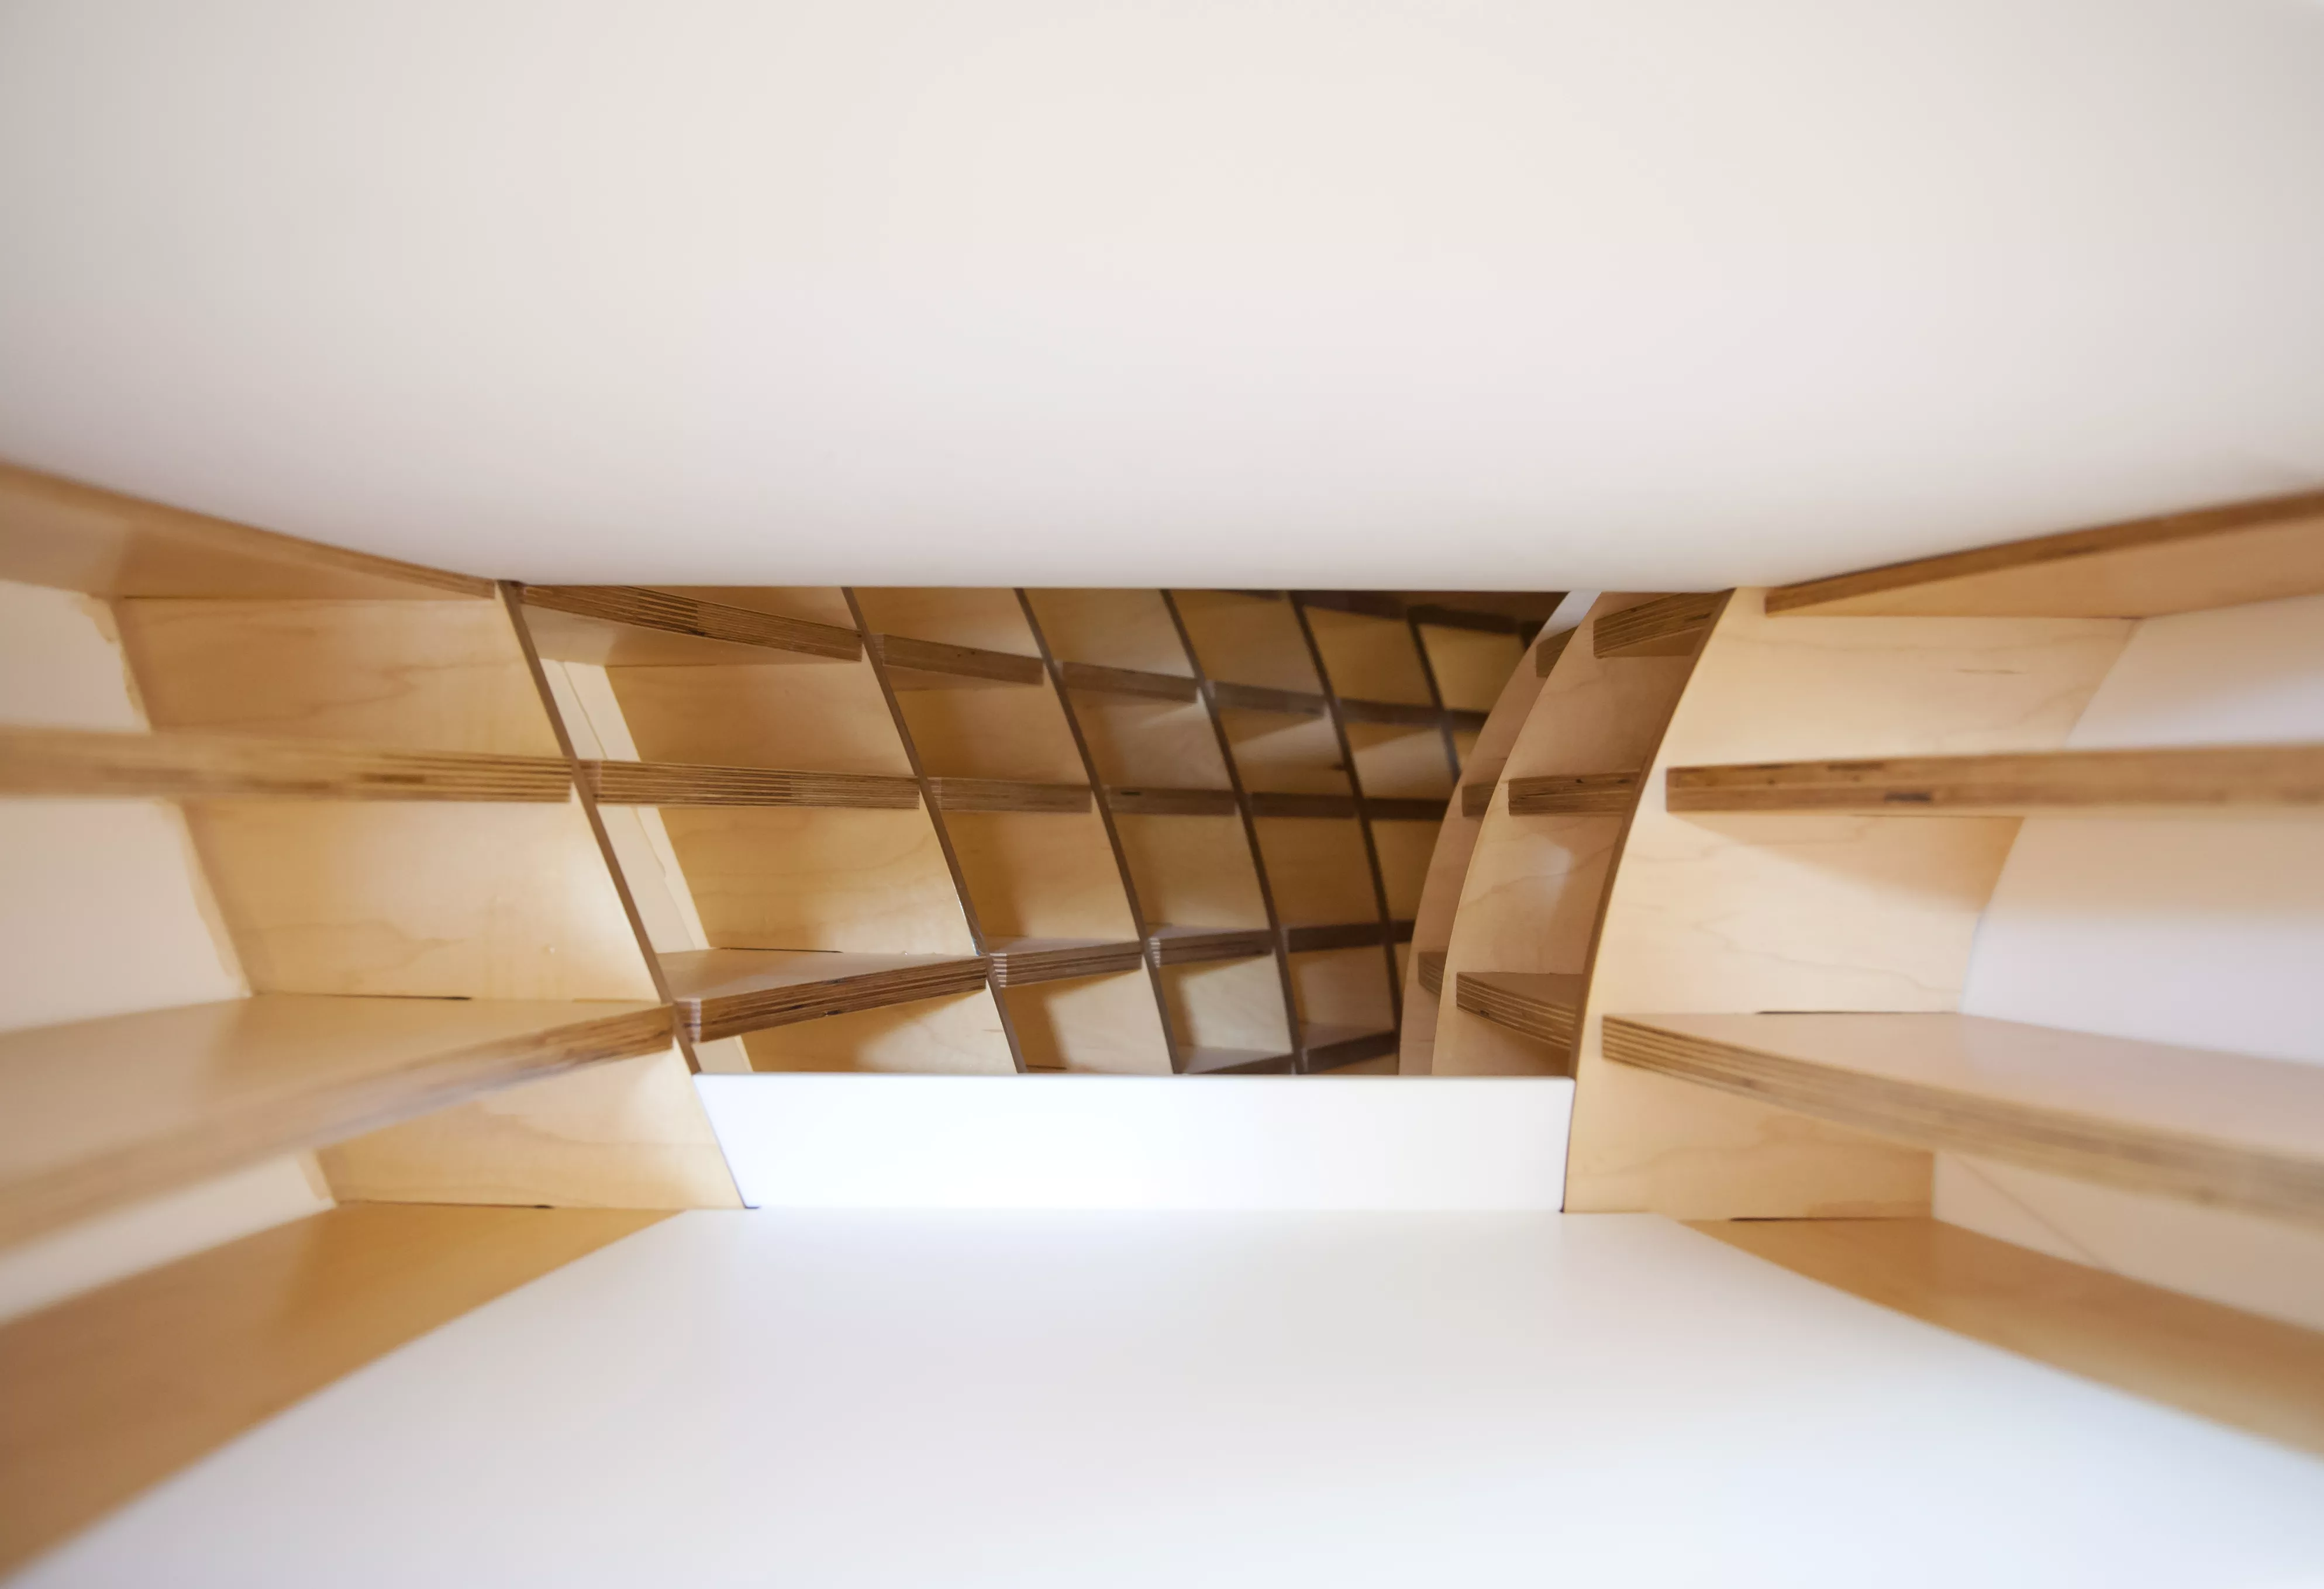
-
Download images
If you are a journalist, it is possible to select the medias you want and ask us to provide them in HD.
ORDER PROJECT IMAGES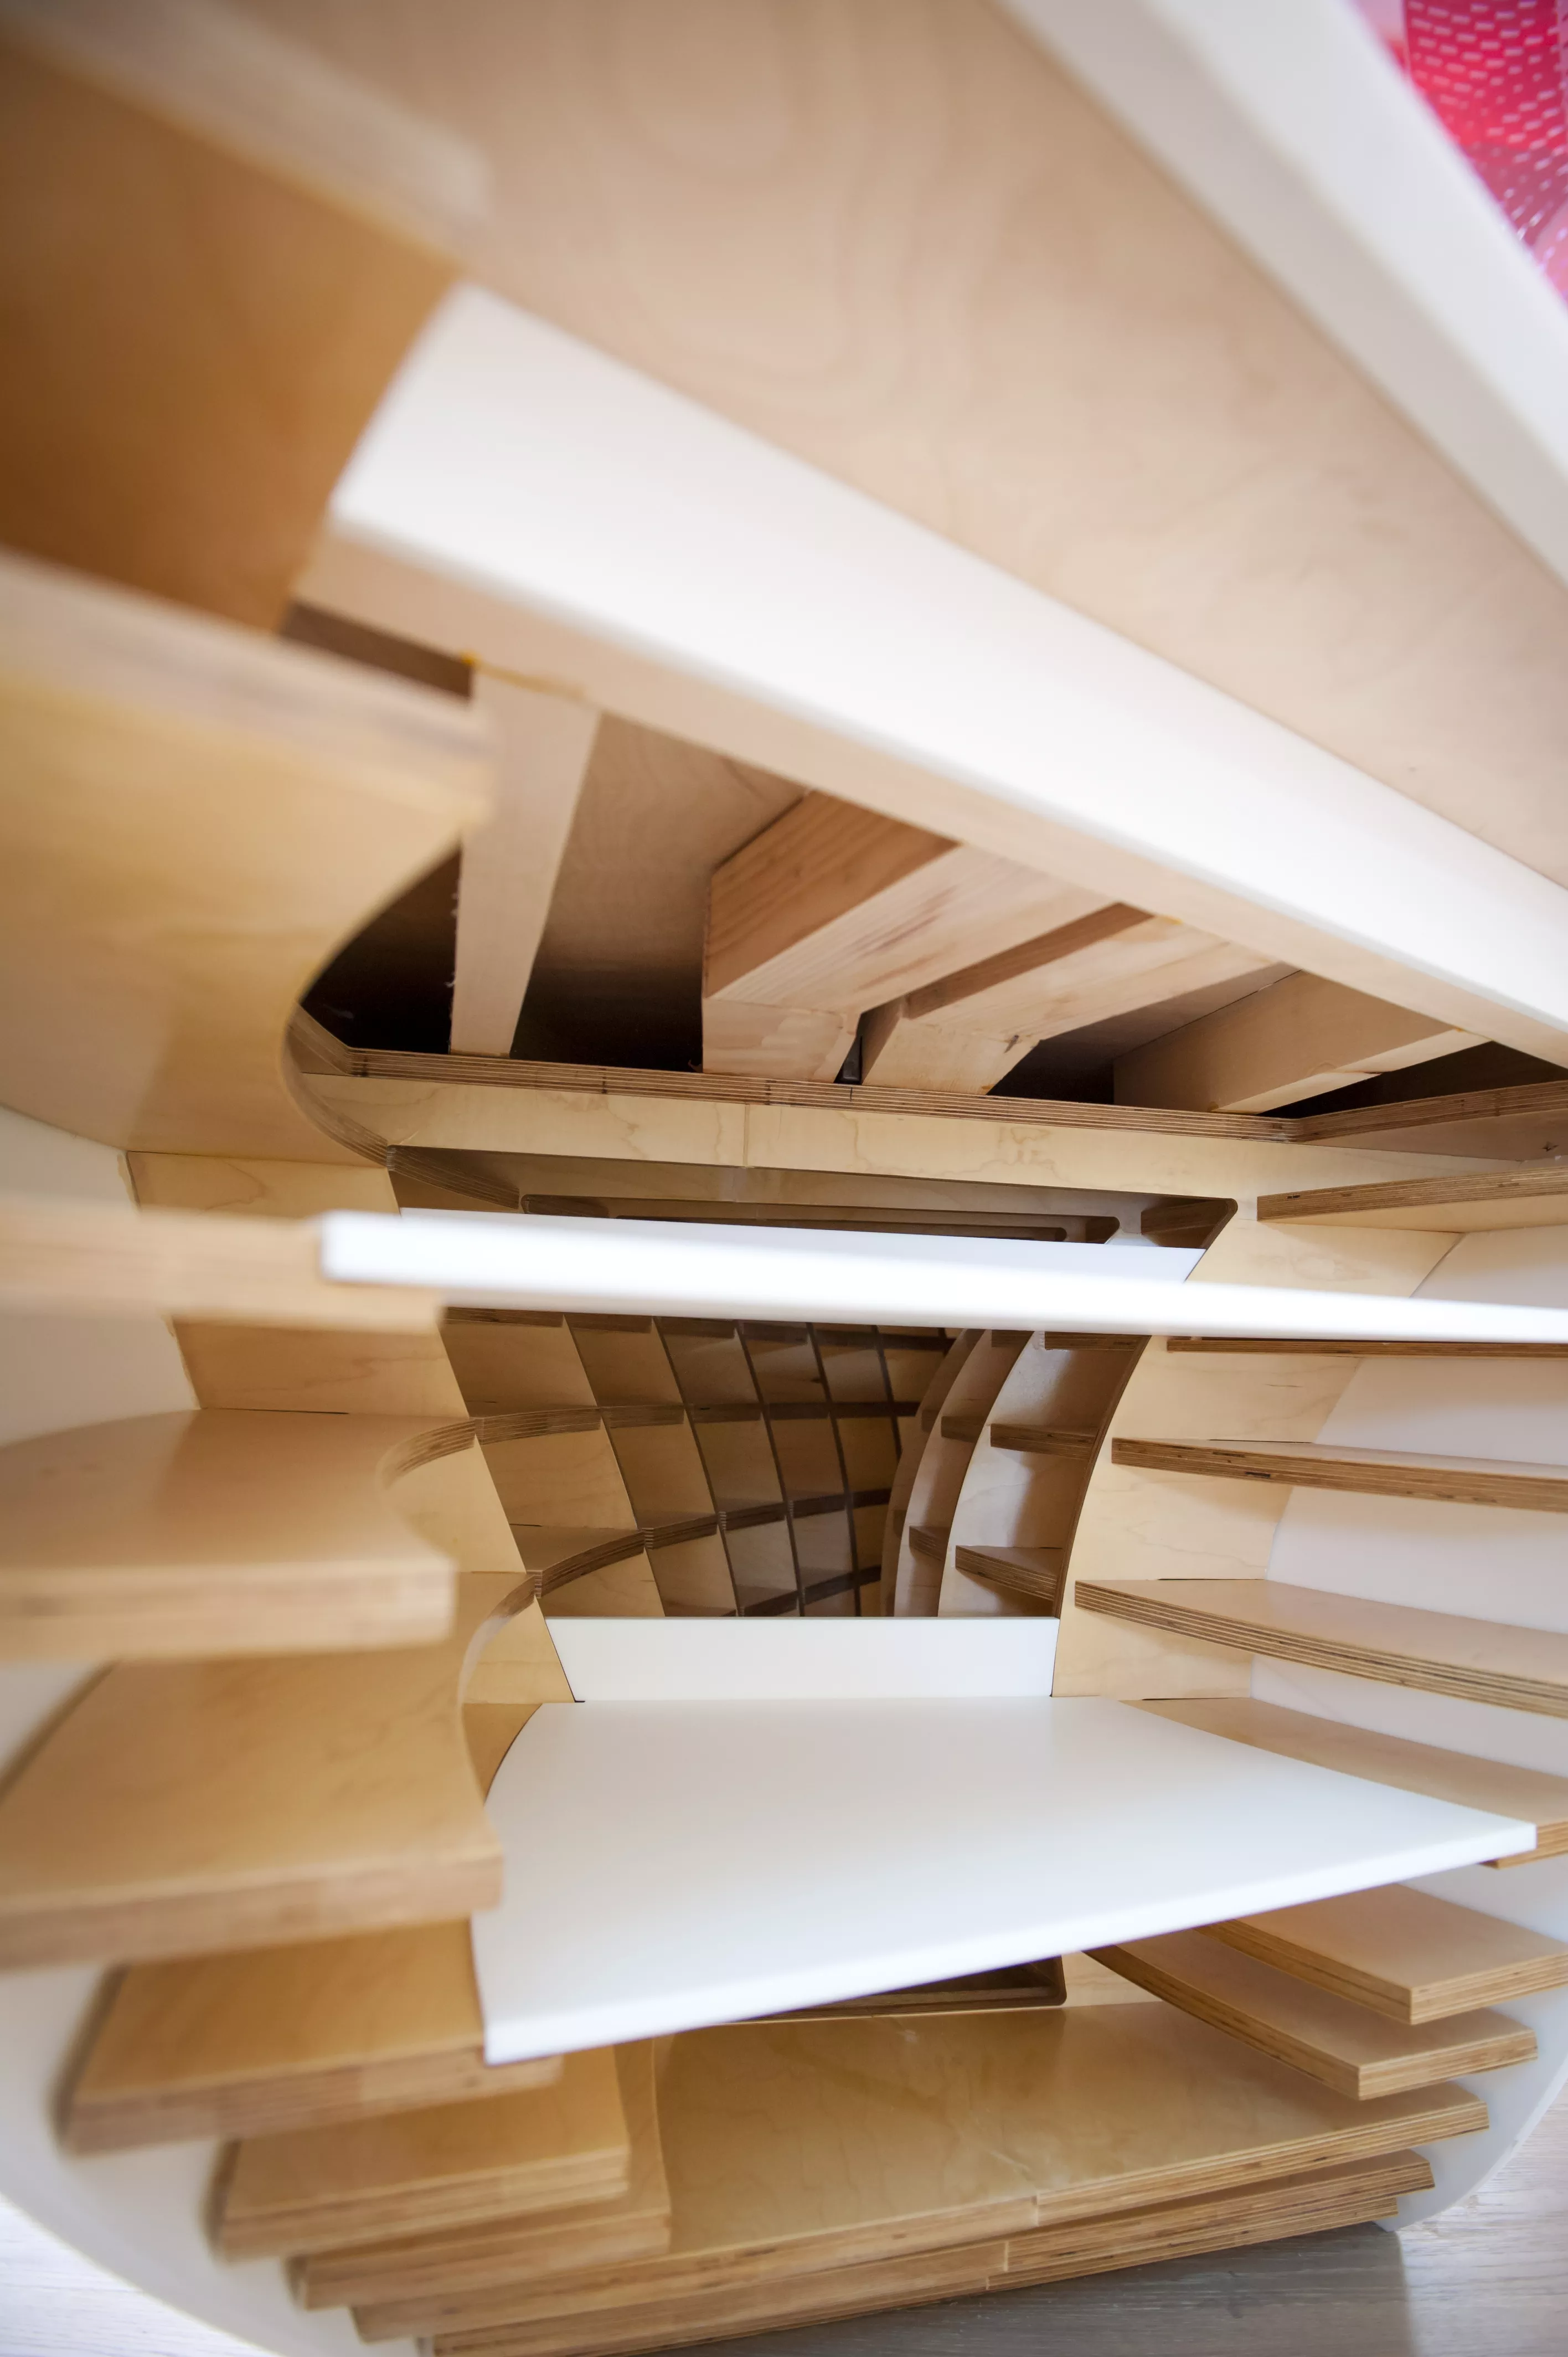
-
Download images
If you are a journalist, it is possible to select the medias you want and ask us to provide them in HD.
ORDER PROJECT IMAGES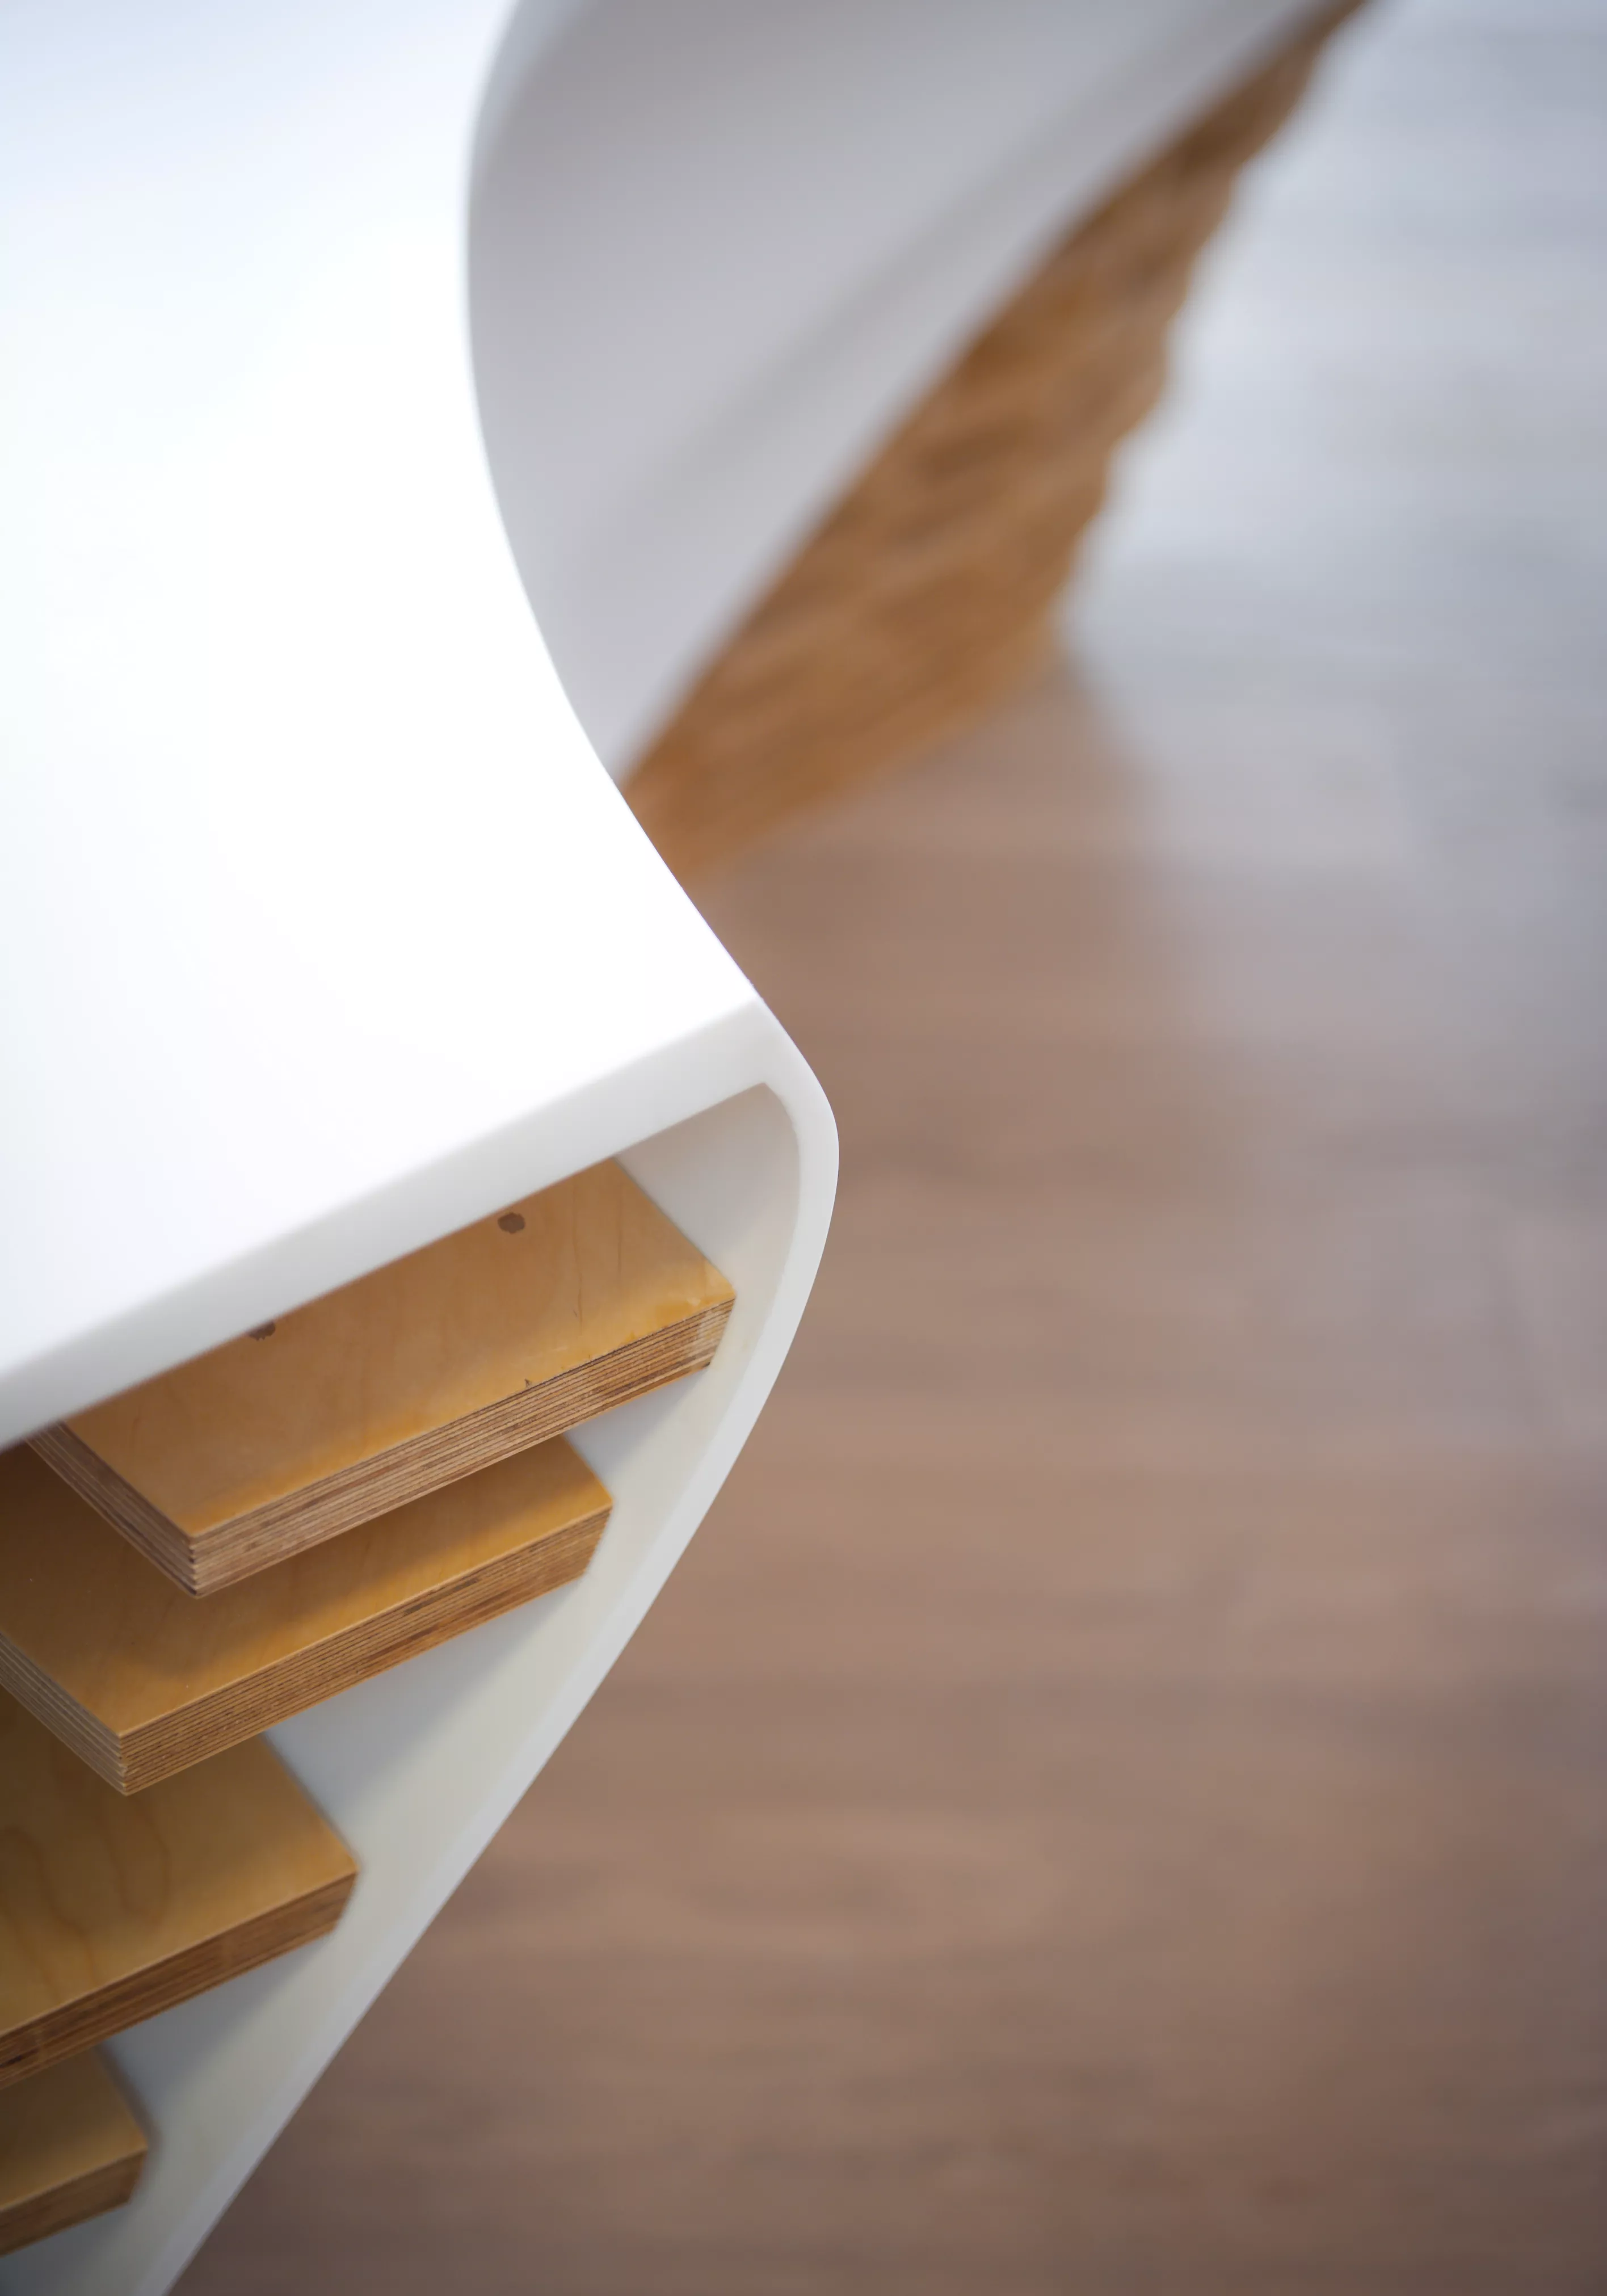
-
Download images
If you are a journalist, it is possible to select the medias you want and ask us to provide them in HD.
ORDER PROJECT IMAGES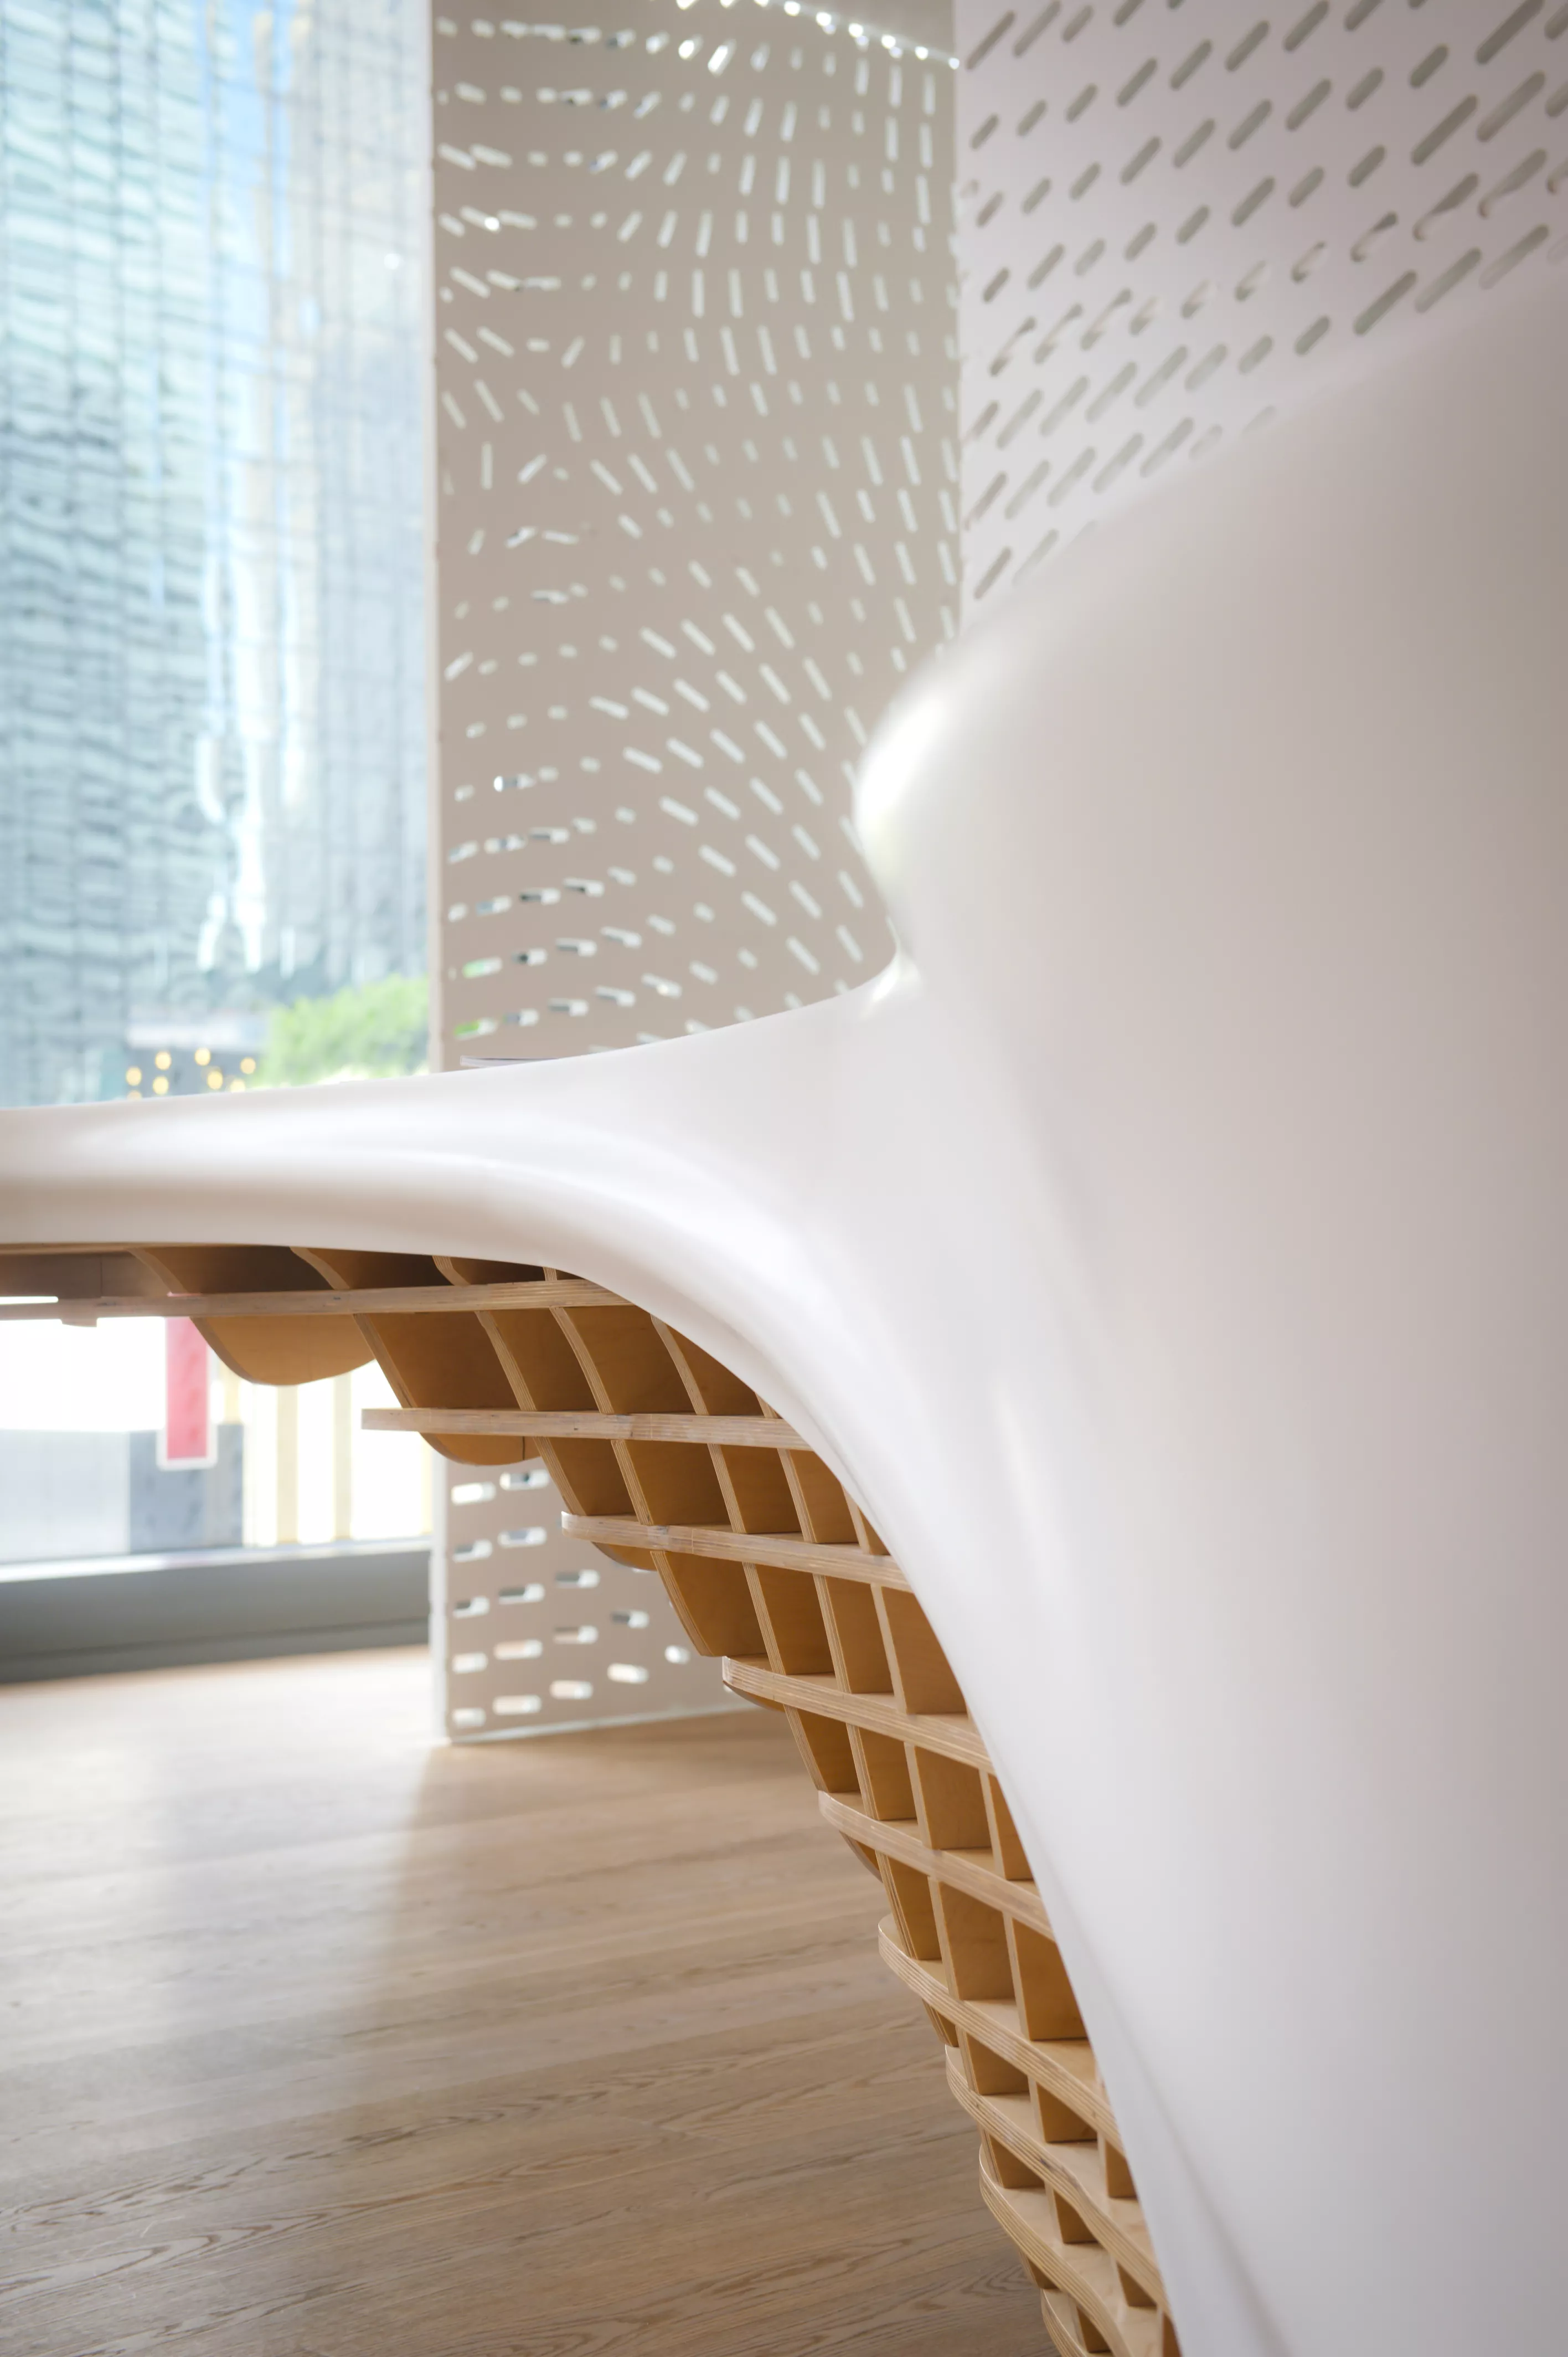
Photo credit: ©Gensler Los Angeles
All images are protected by Copyrights and are only authorized for use by the Media. Please contact us for any other use.
Photo credit: ©Gensler Los Angeles
All images are protected by Copyrights and are only authorized for use by the Media. Please contact us for any other use.
Photo credit: ©Gensler Los Angeles
All images are protected by Copyrights and are only authorized for use by the Media. Please contact us for any other use.
Photo credit: ©Gensler Los Angeles
All images are protected by Copyrights and are only authorized for use by the Media. Please contact us for any other use.
Photo credit: ©Gensler Los Angeles
All images are protected by Copyrights and are only authorized for use by the Media. Please contact us for any other use.
Photo credit: ©Gensler Los Angeles
All images are protected by Copyrights and are only authorized for use by the Media. Please contact us for any other use.
Photo credit: ©Gensler Los Angeles
All images are protected by Copyrights and are only authorized for use by the Media. Please contact us for any other use.
Photo credit: ©Gensler Los Angeles
All images are protected by Copyrights and are only authorized for use by the Media. Please contact us for any other use.
Photo credit: ©Gensler Los Angeles
All images are protected by Copyrights and are only authorized for use by the Media. Please contact us for any other use.
Photo credit: ©Gensler Los Angeles
All images are protected by Copyrights and are only authorized for use by the Media. Please contact us for any other use.
Photo credit: ©Gensler Los Angeles
All images are protected by Copyrights and are only authorized for use by the Media. Please contact us for any other use.
Image library
Added to your Image Library
Go to Image Library page to request HD images, or click OK to continue your image selection.
Media contact
Mariana Fredes +41 (0) 79 693 46 99 mfredes@lxhausys.com
Agnieszka Papież +48 504 976 688 apapiez@lxhausys.com